
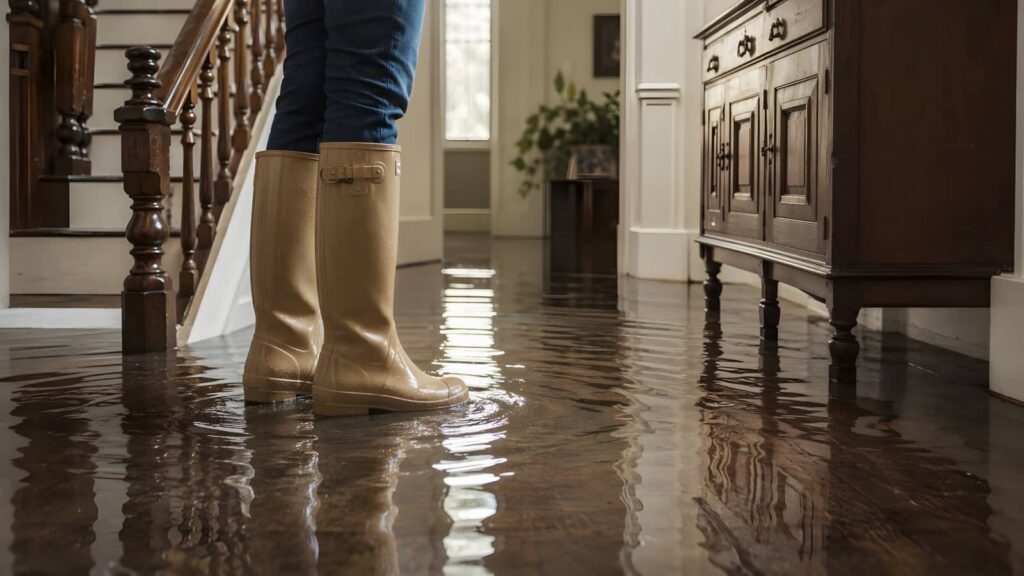
When water damage starts, Rapid Water Damage Cleanup is essential to prevent the problem from getting worse. You need to act fast and in the right order by protecting people, stopping the source, and limiting structural and microbial damage. That means shutting off water and power, removing standing water, and drying materials before contamination spreads. You’ll also need to decide what can be saved and what must be discarded. Taking the right steps early can keep cleanup manageable and help prevent a larger restoration problem.
Key Takeaways
- Shut off water and electricity first, then secure the area to prevent injuries and additional damage during cleanup.
- Document all damage with photos and notes before moving items or removing water for insurance purposes.
- Remove standing water immediately using pumps, wet vacs, buckets, or towels to limit structural damage and mold growth.
- Dry the space quickly with fans, open doors, and dehumidifiers, checking under baseboards and behind appliances for hidden moisture.
- Move valuables to a dry area, discard saturated porous materials, and sanitize affected surfaces after cleaning.
Take These Emergency Steps First
Before you begin cleanup, stop the hazard at its source and secure the area. Keep everyone clear of slippery floors, sagging ceilings, and affected rooms until you complete a quick assessment.
Put on gloves, boots, eye protection, and, if needed, a respirator from your emergency kit. Check for structural instability, contaminated water indicators, and hidden hazards such as compromised outlets or sharp debris.
Next, document conditions with photos and notes for insurance and restoration teams. Move pets, children, and unaffected belongings to a dry, controlled space.
Open pathways for safe access, then place warning signs or barriers to prevent accidental entry. If water may contain sewage, chemicals, or floodborne bacteria, treat the site as hazardous and limit contact.
Shut Off the Water Supply
Once you’ve confirmed the area is safe to approach, shut off the water supply immediately to stop additional intrusion and limit material damage.
Locate the nearest valve serving the leak first, then use the main emergency shutoff if needed. Turn valves clockwise until they stop. If resistance feels abnormal, don’t force it; you could worsen the failure. Stay calm and work systematically.
- You protect your home from escalating loss.
- You gain control during a chaotic moment.
- You support everyone relying on your quick response.
- You create a safer starting point for cleanup.
If you can’t identify the source valve, check the meter box, basement entry point, utility room, or crawlspace.
Once flow stops, verify faucets downstream no longer run, confirming the water supply is isolated and stable.
Turn Off Power in Wet Areas
First, identify electrical hazards by checking for standing water near outlets, appliances, cords, and the service panel.
Next, shut off the affected breakers from a dry, stable location, and don’t enter wet areas if you can’t do so safely.
Before reentry, verify the area is de-energized with a proper tester or confirmation from a qualified electrician.
Identify Electrical Hazards
Because water can energize conductive surfaces and hidden wiring, you should treat every wet area as a potential shock zone and shut off power at the main breaker immediately.
Then begin hazard identification with disciplined observation to protect yourself and everyone relying on you.
- Look for submerged outlets, cords, power strips, or appliances; each can transfer current through standing water.
- Scan walls and ceilings for sagging, staining, or bubbling; trapped moisture may have reached concealed wiring.
- Notice buzzing, crackling, scorch marks, or burning odors; these warning signs signal compromised components and urgent electrical safety risks.
- Mark unsafe zones, keep others back, and document hazards for responders; your calm method helps your household stay connected, protected, and confident.
Don’t touch metal fixtures or wet devices while evaluating conditions.
Shut Off Breakers
Three careful actions matter here: keep your hands dry, stand on a dry surface if possible, and switch off the breakers that control wet rooms or affected circuits without stepping into standing water. This step supports Electrical safety during Water damage and strengthens your Emergency response.
Move deliberately to the service panel, identify labeled circuits, and perform a quick Risk assessment before touching anything. If labels are unclear, shut off the main breaker only when you can do so without exposure to moisture.
Breaker safety means using one hand, keeping your body balanced, and avoiding metal contact. Expect a Power outage in affected areas; that’s part of smart Circuit protection and Home safety.
Verify Safe Reentry
Once you’ve shut off the relevant breakers, verify that wet areas are truly de-energized before you reenter them. Use a non-contact voltage tester on outlets, switches, cords, and metal appliances.
If any device indicates current, stop and isolate the zone. Don’t step onto soaked flooring until you’ve confirmed electrical safety precautions and completed a basic structural assessment for sagging ceilings or weakened subfloors.
- You protect your household from hidden shock hazards.
- You gain confidence by following a clear, proven sequence.
- You reduce panic because each verified step restores control.
- You help everyone feel safer, calmer, and part of a careful recovery effort.
If conditions remain uncertain, wait for a licensed electrician or restoration professional. Your methodical approach keeps your people and property protected today.
Stop the Burst Pipe Leak
First, shut off the main water supply to stop system pressure and limit additional flooding.
Next, locate the pipe break so you can assess the failure point and apply a temporary control measure if it’s safe.
Then, contain spreading water with towels, buckets, or barriers to reduce slip hazards and protect nearby materials.
Shut Off Main Water
If a pipe has burst, shut off your home’s main water valve immediately to stop additional flow and limit structural damage.
Turn the valve clockwise until it stops, then confirm the water supply has ceased at the nearest faucet. If the valve is stiff, use steady pressure, not sudden force, to avoid equipment failure.
Keep everyone informed so your household works as one calm, capable team.
- You’ll feel relief knowing the flooding won’t keep spreading.
- You’ll protect floors, walls, and belongings that make your home feel secure.
- You’ll create safer conditions before any plumbing inspection begins.
- You’ll take control quickly, which helps your family stay confident and connected.
After shutdown, avoid electrical hazards near standing water and prepare for professional assessment.
Your fast response protects your space and everyone in it.
Locate Pipe Break
With the main supply off, trace the leak to the exact pipe break so you can stop any remaining discharge and guide repairs efficiently. Use a flashlight, not open flame, and wear gloves, eye protection, and slip-resistant boots while you work.
Begin your pipe inspection at visible joints, valves, and fittings near the wettest area. Look for splits, pinholes, corrosion, loose couplings, or hairline cracks. If water still beads or drips, use careful leak detection with a dry cloth to confirm the source.
Follow supply lines methodically through walls, ceilings, or crawlspaces only if access is safe and stable. Mark the damaged section clearly with tape or chalk so everyone on your cleanup team recognizes the hazard and stays coordinated.
If the break isn’t accessible, call a licensed plumber immediately for urgent assessment.
Contain Spreading Water
Contain the spread immediately by blocking flow paths and capturing residual discharge from the burst pipe. You should isolate the affected area fast, then place water barriers at thresholds, vents, and low spots.
Pack absorbent materials around the leak and along runoff edges to limit migration. Move rugs, cords, and furniture from wet zones, and shut off nearby electricity if safe. Your quick, disciplined response protects both your home and everyone in it.
- You create control when chaos starts spreading.
- You protect shared spaces your household depends on.
- You reduce slip, shock, and mold risks before they escalate.
- You show everyone they’re not facing this emergency alone.
Keep checking for seepage under baseboards and behind appliances. Reposition barriers as water pressure changes, and replace saturated absorbents promptly.
Remove Standing Water Immediately
Because standing water drives rapid structural damage and microbial growth, remove it as soon as you can do so safely. Shut off electricity to affected areas first, and wear waterproof boots, gloves, and eye protection before you begin.
If water levels are deep or contaminated, stop and call trained professionals immediately.
For manageable indoor flooding, use proven cleanup techniques: a wet/dry vacuum, submersible pump, mop, or absorbent towels, depending on depth. Work from the highest point toward the drain or exit path so you don’t redistribute moisture.
Empty collection tanks outside and sanitize equipment after use. Check floors continuously for soft spots, slipping hazards, and hidden pooling near baseboards.
Move Furniture and Valuables Out
Next, you should remove furniture and valuables from the wet area in a controlled order, starting with high-value items that can suffer rapid, irreversible damage.
Lift furniture quickly to limit water absorption and floor staining, and use proper lifting technique to reduce injury risk.
You should also isolate and protect delicate belongings with clean, dry covers or containers so they don’t sustain secondary damage during cleanup.
Prioritize High-Value Items
Triage matters when water starts spreading: move high-value items first, including upholstered furniture, electronics, important documents, rugs, and irreplaceable belongings.
You should isolate priorities by replacement cost, contamination risk, and drying potential. Photograph each item before relocation to support insurance coverage and guide salvage techniques. Unplug electronics only if circuits are dry and safe.
- Your family photos anchor shared memories; protect them first.
- Important papers preserve identity, ownership, and peace of mind.
- Heirlooms connect you to your people and personal history.
- Rugs and upholstered pieces hold comfort, warmth, and familiarity.
Work systematically: sort, document, relocate, then stabilize.
Use clean, dry zones for storage, and keep wet and dry categories separate to limit cross-contamination.
Lift Furniture Quickly
Lift furniture and valuables out of standing water as soon as you can do it safely. Shut off electricity to affected rooms first, then test each path for slip hazards and structural weakness.
Work with a partner so your team can stabilize heavy pieces, prevent strain injuries, and speed quick relocation to dry zones.
Use gloves, boots, and proper lifting mechanics: bend your knees, keep loads close, and avoid twisting.
Prioritize upholstered items, wood furniture, and anything with metal fasteners, since prolonged contact accelerates swelling, rust, and contamination.
Set pieces on blocks, foil, or pads to create temporary furniture elevation and limit wicking from wet floors. If an item is too heavy, remove drawers or shelves to reduce weight before moving it.
Acting together, you’ll protect your space and keep cleanup organized and efficient.
Protect Delicate Belongings
Because water can warp, stain, or contaminate sensitive items within hours, move delicate belongings to a clean, dry area immediately after you’ve secured the space.
Prioritize electronics, documents, heirlooms, textiles, and framed photos. Wear gloves, lift items carefully, and keep wet surfaces isolated to reduce cross-contamination. Photograph each item before relocation to support insurance coverage and document condition accurately.
- Save irreplaceable keepsakes first, so your home still feels like yours.
- Separate soaked fabrics to prevent dye transfer, odor, and microbial growth.
- Elevate wooden pieces and artwork to limit swelling, delamination, and staining.
- Group damaged valuables by material, helping your community of responders assess restoration options quickly.
You’ll protect what matters most while creating an orderly, safer cleanup path for everyone involved together.
Dry the Area as Fast as Possible
Once you’ve stopped the water source and removed standing water, start drying the area immediately to limit swelling, warping, corrosion, and mold growth.
Open interior doors, move air with fans, and apply proven ventilation techniques to create steady crossflow. Position equipment to direct moisture outward, not into unaffected rooms. Use GFCI-protected outlets and keep cords clear of damp pathways.
Prioritize dehumidifier use in enclosed spaces, especially basements, bathrooms, and utility rooms.
Empty reservoirs regularly or route drainage safely to maintain continuous operation. Lift lightweight furniture on blocks, remove drawers, and separate cushions so hidden surfaces can dry evenly.
Check humidity levels with a hygrometer and document readings. As a careful homeowner, you’re protecting your shared living space and helping everyone return to a safe, comfortable routine faster.
Discard Wet Drywall, Carpet, and Insulation
When porous materials stay wet for more than a short period, you should remove and discard them instead of trying to salvage them. Cut out saturated drywall above the waterline, pull wet insulation, and remove carpet with its pad.
These materials trap moisture, undermine structural integrity, and weaken moisture control, even when surfaces seem dry.
- You protect your home from hidden deterioration.
- You support mold prevention before colonies spread.
- You create safer conditions for everyone under your roof.
- You move your recovery forward with proven restoration techniques.
Work methodically: shut off power to affected circuits, wear gloves and respiratory protection, bag debris promptly, and isolate the work zone.
Sanitize Everything After Cleanup
After you’ve removed damaged materials and extracted standing moisture, sanitize all affected surfaces to reduce microbial contamination and limit odor-causing residue.
Wear gloves, eye protection, and an N95 respirator, then ventilate the area before you begin. Use approved sanitization techniques on floors, framing, baseboards, and nonporous contents, following label directions for dilution, dwell time, and rinsing.
Focus on disinfecting surfaces that floodwater touched, especially corners, seams, and hidden cavities where residue can remain.
Clean first with detergent if soil is present, because organic matter weakens disinfectants. Change cloths often, avoid cross-contamination, and bag disposable wipes immediately.
As you work carefully and consistently, you help protect your household’s shared space and create a cleaner, safer environment everyone can trust again after the cleanup process.
Call a Water Damage Pro If Needed
If moisture has spread beyond visible surfaces, call a qualified water damage professional to assess and stabilize the area.
Hidden saturation inside insulation, subflooring, and wall cavities can escalate quickly, so you shouldn’t rely on surface drying alone. A trained team uses moisture meters, thermal imaging, containment, and controlled drying to support safe emergency response and long-term water damage prevention.
- You’ll protect your home before unseen damage weakens what shelters your family.
- You’ll gain confidence when experts verify that drying meets safety standards.
- You’ll avoid the isolation of guessing while a trusted crew guides each step.
- You’ll feel relief knowing professionals can document losses for insurance and recovery.
When electrical risks, sewage contamination, or structural instability appear, escalate immediately.
Acting fast connects you with the right help and keeps everyone safer.
Frequently Asked Questions
How Long Does Insurance Claim Processing Usually Take for Water Damage?
You can expect your water damage insurance claim timeline to run about 2–6 weeks, though processing factors like documentation, inspections, mitigation records, and policy limits can extend it. You’ll stay aligned by submitting complete, verifiable evidence promptly.
Can Water Damage Lower My Home’s Resale Value?
Yes, water damage can lower your home’s resale value through measurable resale impact and negative market perception. You protect value when you document repairs, verify moisture remediation, and show buyers your home meets safety expectations.
What Certifications Should a Water Damage Restoration Company Have?
You should choose firms with IICRC certification types, licensed technicians, and OSHA training; flashy promises mean little, verified restoration standards protect you. You’ll join homeowners who prioritize safe procedures, documented competence, and methodical remediation that lasts.
How Can I Prevent Mold After Hidden Water Leaks?
You prevent mold after hidden leaks by locating moisture fast, fixing leaks, drying cavities within 24–48 hours, and verifying humidity stays below 60%. For reliable mold prevention, inspect insulation, framing, and HVAC spaces with your team.
Will Water Damage Affect My Home’s Structural Integrity Later?
Yes—water damage can quietly compromise your home’s structural safety later. You should inspect framing, subfloors, and fasteners promptly because trapped moisture weakens load paths, corrodes connections, and can leave your household facing preventable, escalating risks.
Summary
Act fast and follow each step in order to limit structural damage, electrical hazards, and mold growth. Shut off utilities, stop the leak, remove water, dry all surfaces, discard saturated porous materials, and sanitize thoroughly. Treat the cleanup like a triage line: address the highest-risk issues first, then stabilize the rest. If damage is widespread or hidden, don’t guess—bring in a qualified water damage professional to protect your property and your health.