When disaster strikes, like a flood, swift stop mold is essential to prevent mold from taking hold. You need to assess the damage and ensure your safety before diving into cleanup. Removing standing water is just the beginning; drying out affected areas and disinfecting surfaces are critical steps. But how do you monitor for mold growth effectively once everything seems dry? Understanding these processes can help you safeguard your space against this persistent threat.
Key Takeaways
- Assess and document damage, identifying visible mold and structural weaknesses before starting the cleanup process.
- Remove standing water promptly using pumps or wet vacuums while ensuring safety precautions.
- Dry affected areas thoroughly with dehumidifiers and fans to lower humidity levels below 60%.
- Clean and disinfect all surfaces exposed to moisture using appropriate cleaning agents.
- Monitor for mold growth regularly by inspecting damp areas and using moisture meters to check humidity levels.
Assess the Damage and Safety Hazards
Before you tackle mold removal, it’s essential to assess the damage and identify any safety hazards.
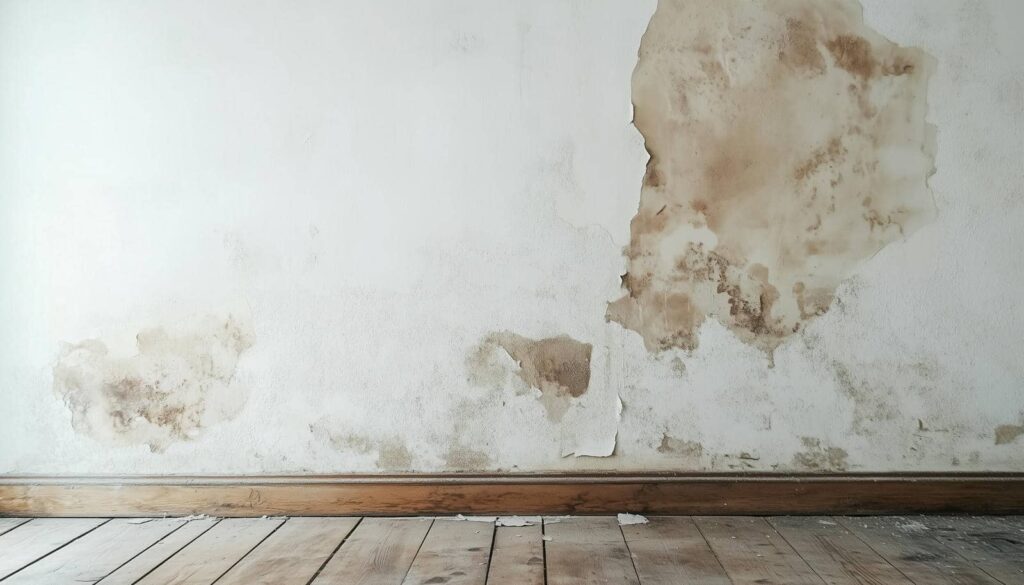
Start your damage assessment by examining all affected areas, including walls, floors, and furniture. Take note of any visible mold growth or water damage, as these can indicate the extent of the problem.
Next, conduct a safety evaluation to verify your environment is secure. Check for structural weaknesses, such as sagging ceilings or unstable surfaces that could pose risks during cleanup.
Don’t forget to take into account potential electrical hazards; if water has reached outlets or wiring, you’ll want to turn off the power before proceeding.
By thoroughly evaluating both the damage and any safety concerns, you’ll protect yourself and create a safer, more effective mold removal plan.
This careful approach fosters a sense of community, as you’re taking the necessary steps to verify your space remains safe for everyone involved.
Remove Standing Water Quickly
To effectively combat mold growth, you need to remove standing water as quickly as possible.
Prioritize your safety by evaluating potential hazards before starting the extraction process.
Utilize the right tools and techniques to ensure efficient water removal, minimizing the risk of further damage.
Safety First Considerations
Since mold thrives in damp environments, removing standing water quickly is crucial for preventing its growth and protecting your health.
Before you begin, prioritize flood safety by wearing personal protective equipment, such as gloves, masks, and boots. This gear shields you from contaminants and potential pathogens that floodwater may contain.
Verify your work area is well-ventilated to minimize inhalation risks. If the water is deep, consider disconnecting electrical circuits to avoid electrocution hazards.
Always assess the stability of structures before entering; flooded areas can compromise their integrity. Keep a first aid kit handy and have emergency contacts available.
Effective Water Removal Techniques
With safety measures in place, it’s time to focus on effective water removal techniques to eliminate standing water quickly.
Begin with water extraction methods that suit your situation, such as using pumps or wet vacuums. The faster you act, the less damage occurs, helping with flood prevention.
Ascertain you’ve removed as much water as possible, as lingering moisture can lead to mold growth.
Don’t forget to ventilate the area; open windows and use fans to promote airflow.
If you’re dealing with a large space, consider enlisting professional help for efficient water removal.
This proactive approach protects your property while fostering a sense of community, showing that you care for your home and those around you.
Tools for Quick Extraction
When it comes to quick extraction of standing water, having the right tools can make all the difference. Effective extraction equipment helps you remove water swiftly and plays a vital role in mold prevention.
Here are four essential tools you’ll need:
Wet/Dry Vacuum: Ideal for sucking up standing water quickly and efficiently.
Submersible Pump: Perfect for larger volumes, it can handle deeper water levels.
Mop and Buckets: Useful for smaller areas and finishing touches after the bigger equipment is done.
Dehumidifier: Reduces moisture in the air, aiding in drying out the space and preventing mold growth.
With these tools, you’re well-equipped to tackle standing water and safeguard your home.
Dry Out Affected Areas
To effectively stop mold growth, you need to dry out affected areas as quickly as possible. Start by utilizing dehumidifiers in every room that’s been impacted. These devices help extract moisture from the air, making it less conducive for mold to thrive. Aim for a relative humidity level below 60%.
Next, enhance air circulation by opening windows and using fans. Position fans to direct airflow towards damp areas, which will greatly speed up the drying process. If you have central air conditioning, run it to control humidity levels further.
Check for hidden moisture in walls, carpets, and furniture, as these can harbor mold spores.
Clean and Disinfect Surfaces
Start by thoroughly cleaning and disinfecting surfaces that have been exposed to moisture. This step is essential to prevent mold growth and ensure a safe environment.
Choose the appropriate cleaning agents for different surface types to maximize effectiveness. Here’s a quick guide to help you:
Non-porous surfaces (like tiles and glass): Use a mixture of water and vinegar or a bleach solution to disinfect effectively.
Wooden surfaces: Opt for specialized wood cleaners that won’t damage the finish while providing antimicrobial properties.
Fabrics and carpets: Use steam cleaning or a fabric-safe mold cleaner to eliminate spores without harming the material.
Walls and ceilings: Apply a mold-killing solution designed for painted surfaces, making sure you follow all safety precautions.
Remove Contaminated Materials
After cleaning and disinfecting surfaces, addressing any contaminated materials is essential for effective mold remediation.
Start by identifying items that have absorbed water and show signs of mold growth, such as carpeting, drywall, or insulation. These materials often require removal, as they’re difficult to restore.
When disposing of contaminated items, use appropriate disposal methods—seal them in plastic bags to prevent mold spores from spreading.
Consider replacing these materials with mold-resistant options. Mold-resistant drywall and insulation can be excellent choices, as they help prevent future infestations.
For furniture or textiles that can’t be salvaged, ensure proper disposal to protect your home and health.
Monitor for Mold Growth
To effectively prevent mold, you need to conduct regular inspections of your home.
Use moisture meters to identify areas at risk due to high humidity levels.
Regular Inspections Needed
While you might think your home is free of mold, regular inspections are essential to catch hidden growth before it becomes a larger issue.
To ensure effective mold prevention, establish a consistent inspection frequency. Here are four key steps you should follow:
Inspect damp areas: Check basements, bathrooms, and kitchens regularly.
Look for discoloration: Pay attention to walls and ceilings for any unusual stains.
Monitor air quality: Use your senses; musty odors can indicate mold presence.
Check HVAC systems: Confirm filters and ducts are clean and free of moisture.
Use Moisture Meters
One effective way to monitor for mold growth in your home is by using moisture meters.
These tools are essential for moisture detection, providing accurate readings of humidity levels in various areas.
When your home has been flooded, it’s critical to regularly check these levels, as high humidity can create an ideal environment for mold.
By using a moisture meter, you can identify damp spots that may not be visible to the naked eye.
This proactive approach helps you address potential mold issues early and fosters a healthier living space for you and your family.
Staying vigilant with moisture detection is key to maintaining comfort and safety in your home after flooding.
Frequently Asked Questions
How Long Does It Take for Mold to Start Growing After Flooding?
Mold growth can begin within 24 to 48 hours after flood damage occurs. If you don’t act quickly to dry out affected areas, you risk significant mold issues that can impact your health and property.
Can I Use Bleach to Kill Mold Effectively?
You can’t rely on bleach to kill mold effectively. It’s a common myth. While bleach can disinfect surfaces, it doesn’t penetrate porous materials, allowing mold to regrow. Consider alternatives like specialized mold removers for better results.
What Types of Personal Protective Equipment Should I Wear?
You should wear safety goggles, an N95 respirator, gloves, and waterproof boots as protective gear. These precautions help minimize exposure to mold spores and contaminants, ensuring you stay safe while addressing mold issues effectively.
Are There Specific Mold-Resistant Products to Use After Flooding?
Are you ready to protect your home? Use mold-resistant paints and apply antimicrobial treatments to surfaces. These products prevent mold growth and create a safe, welcoming space for you and your loved ones.
When Should I Call a Professional for Mold Removal?
You should call a professional for mold removal if you notice extensive growth, persistent odors, or health issues. They’ll conduct a thorough mold inspection and apply effective remediation methods to ensure safety and long-term prevention.
Summary
In the aftermath of flooding, swift action is essential. By evaluating damage, removing water, drying out spaces, and disinfecting surfaces, you can greatly reduce the chances of mold growth. Remember, vigilance is key; monitor for any signs of mold as you restore your home. Don’t let a little moisture turn into a big problem—take control now, and safeguard your environment. After all, a proactive approach today can save you from a mold crisis tomorrow.