When faced with flooding, it’s essential to act methodically to minimize damage. Start by evaluating the situation to identify water sources and potential hazards. Next, ensure safety by turning off utilities and gathering the right equipment. Each step is imperative in effectively removing water and cleaning your property. Following this guide can make a significant difference, but the steps don’t end there. Understanding the complete process is important for long-term safety and prevention.
Key Takeaways
- Assess the situation by identifying water sources, inspecting for damage, and ensuring safety precautions are in place before starting removal.
- Turn off utilities such as gas, water, and electricity to prevent hazards during flood water removal.
- Use a submersible pump for deep water or a wet/dry vacuum for smaller areas to effectively extract water.
- Dispose of contaminated materials properly, labeling them as hazardous waste, and ensure mold removal before disposal.
- Dry and dehumidify the area using fans and dehumidifiers, while cleaning surfaces with disinfectants to prevent mold growth.
Assessing the Situation
When you’re faced with flooding, how do you determine the extent of the damage? Start by identifying the primary water sources involved—whether it’s rainwater, groundwater, or a backed-up sewer.
Inspect your property thoroughly, focusing on areas that typically accumulate water, like basements and crawlspaces. Look for visible signs of flood damage, including warped flooring, mold growth, or discoloration on walls.
Next, measure the water level and document it with photographs for insurance purposes. Pay attention to structural components; if you notice sagging ceilings or compromised foundations, it’s critical to assess the risk of collapse.
Keep track of affected materials, as some might need immediate removal to prevent further damage.
Gathering Necessary Equipment
After evaluating the situation and understanding the extent of the flooding, the next step involves gathering the necessary equipment to tackle the water removal process effectively.
Start by procuring flood barriers to prevent further water influx and protect unaffected areas. You’ll need a reliable water extraction pump; submersible pumps are ideal for removing standing water quickly. If the flooding is extensive, consider a truck-mounted pump for greater efficiency.
Don’t forget to grab wet/dry vacuums for smaller spaces and corners. Equip yourself with hoses and extension cords to ensure flexibility during the operation.
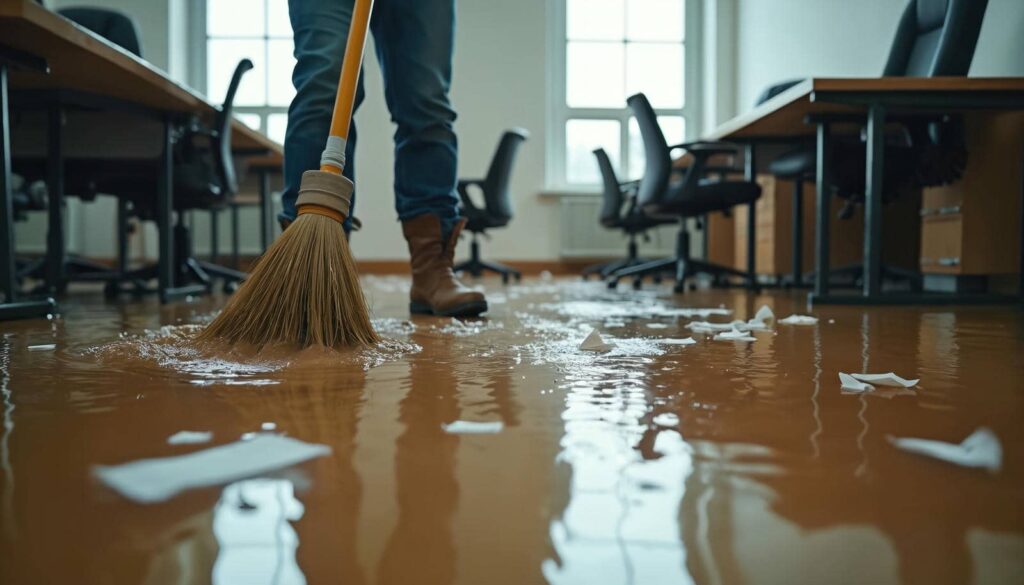
Heavy-duty buckets and squeegees can also assist in manual removal. Finally, collect towels or absorbent materials to soak up residual water.
Having these tools at your disposal will streamline the process, allowing you to restore your space effectively and efficiently. Remember, each piece of equipment plays a crucial role in your recovery efforts.
Ensuring Safety Precautions
Although tackling flood water removal is crucial, prioritizing safety precautions is essential to protect yourself and others. First, verify you’ve got adequate flood insurance to cover potential losses.
Before starting, gather emergency kits equipped with necessary supplies like water, non-perishable food, flashlights, and first aid items. Wear protective gear, including gloves, boots, and masks, to shield yourself from contaminants and debris.
Check for structural damage before entering your home; small cracks can pose serious risks. Always have a buddy with you for added safety and support.
Be vigilant about electrical hazards; avoid standing water near outlets or appliances. If you smell gas or notice a leak, evacuate immediately.
Maintain clear communication with family and neighbors, sharing updates and resources. By adhering to these safety measures, you’ll navigate the flood water removal process with greater confidence and security.
Turning Off Utilities
Before you turn off utilities, you must first identify their locations to ensure you can access them safely.
Always prioritize safety by wearing appropriate gear and taking precautions against potential hazards.
Once you’re prepared, follow the utility company guidelines to properly shut off each service.
Identify Utility Locations
When floodwaters invade your property, knowing how to identify and turn off utility locations is essential for ensuring safety.
Start by conducting utility mapping of your home to pinpoint the exact locations of gas, water, and electricity shut-off valves. Use blueprints or online resources if available for location verification.
Once you’ve located the shut-off points, familiarize yourself with how each utility operates. For gas, typically, a quarter turn to the right will stop the flow. For water, turn the valve clockwise until it stops. Electric panels may require flipping the main breaker switch.
Always confirm you wear appropriate protective gear when handling utilities in a flood situation. This knowledge empowers you to act decisively and safely.
Safety Precautions First
As floodwaters rise, prioritizing safety by turning off utilities is essential to prevent additional hazards.
Start by putting on personal protective equipment, including gloves and boots, to shield yourself from contaminants.
Locate your main power switch and water valves—do this quickly but carefully. If you can do so safely, turn off the electricity at the main breaker and shut off the gas supply. This minimizes the risk of electrical shock or gas leaks.
Before you begin, keep a list of emergency contacts handy, including local utility companies, in case you need assistance.
Follow Utility Company Guidelines
To ensure safety when turning off utilities, it’s crucial to follow the specific guidelines provided by your utility company, as they can offer detailed instructions tailored to your local infrastructure.
Begin by locating your main power switch and gas valves, ensuring all appliances are unplugged.
Contact emergency contacts, like local electricians or plumbers, for assistance if you’re unsure. Remember, utility assistance is available if you encounter challenges during this process.
Always check your utility companies’ websites for updates on service interruptions or safety protocols.
Once you’ve turned off the utilities, keep your family informed about the status and next steps. This fosters a sense of belonging and reassures everyone that you’re taking responsible actions together.
Removing Water With Pumps
While flood water can quickly overwhelm a space, using pumps offers an effective solution for swift removal. Start by selecting the right pump type for your situation. Submersible pumps are ideal for deep water, while utility pumps work well for smaller areas.
Once you’ve chosen your pump, verify it’s in good condition through proper pump maintenance—check for clogs and verify all connections are secure.
Next, place the pump in the lowest area of the flooded space, allowing gravity to assist in water removal. If your pump has a discharge hose, position it to direct water away from your property.
Turn on the pump and monitor its operation, making adjustments as necessary. Remember to periodically inspect the pump during use to prevent overheating or damage.
Using Wet/Dry Vacuums
When tackling flood water removal, selecting the right wet/dry vacuum is essential for effective cleanup.
Before using the vacuum, make sure you’ve prepared the area properly by removing obstacles and making certain safety measures are in place.
Understanding proper cleanup techniques will maximize the vacuum’s efficiency and help prevent further water damage.
Choosing the Right Vacuum
Choosing the right vacuum for flood water removal is essential to effectively manage the cleanup process, and a wet/dry vacuum is often your best option.
When selecting a vacuum, pay attention to specific vacuum features such as suction power, tank capacity, and filtration systems. High suction power ensures efficient water removal, while a larger tank minimizes the need for frequent emptying during use.
Consider different vacuum types; some are designed for heavy-duty tasks, while others are more portable. A vacuum with a good filtration system helps to trap contaminants, improving air quality as you clean.
Preparation Before Use
Before you start using your wet/dry vacuum for flood water removal, it’s important to prepare both the equipment and the area effectively.
First, verify your vacuum is in good working order; check the hoses, filters, and collection tank. Next, gather necessary supplies, like extension cords and personal protective equipment, including gloves and boots.
It’s wise to inform your emergency contacts about your situation, as they may offer assistance if needed. Additionally, if you have flood insurance, review your policy to understand coverage details for the damage.
Clear the area of debris to avoid clogs and ensure safe operation. By taking these steps, you’ll create a conducive environment for efficient flood water removal.
Proper Cleanup Techniques
Start by positioning your wet/dry vacuum at a strategic point where the water is deepest, ensuring you can cover the largest area effectively.
Follow these steps for ideal cleanup and mold prevention:
Set the Vacuum to the Correct Function: Confirm it’s set to water removal mode.
Create a Path: Move furniture and obstacles to allow easy access and flow of water toward the vacuum.
Vacuum in Sections: Start from the deepest point and work your way outward, making sure to overlap your strokes to avoid leaving water behind.
Monitor for Moisture: Check for areas of lingering dampness to address with additional vacuuming, as this prevents further water damage.
Disposing of Contaminated Materials
As you assess the aftermath of flooding, it’s crucial to recognize that contaminated materials, such as soaked drywall, carpets, and insulation, pose serious health risks and must be disposed of properly.
Begin by identifying hazardous waste. This includes everything that’s been in contact with floodwater, which may contain bacteria, chemicals, or mold spores.
To dispose of these items, wear protective gear, including gloves and masks. Carefully remove contaminated materials and place them in heavy-duty garbage bags. Clearly label these bags as hazardous waste and follow local guidelines for disposal. Some municipalities offer specific drop-off locations for hazardous waste.
If mold is present, verify that mold removal is addressed before disposing of materials to prevent spores from spreading throughout your home.
Drying and Dehumidifying the Area
To effectively dry and dehumidify the area after flooding, start by strategically placing fans to enhance air circulation.
This will help evaporate moisture from surfaces more quickly.
Simultaneously, monitor humidity levels using a hygrometer to ensure the environment remains conducive for drying.
Use Fans Effectively
Utilizing fans effectively can greatly expedite the drying and dehumidifying process after a flood.
To maximize their impact, focus on the following key strategies:
Fan Placement: Position fans in the most affected areas, ensuring they’re evenly distributed throughout the space.
Airflow Direction: Angle fans towards walls or ceilings to promote circulation and prevent mold growth.
Cross-Ventilation: Use multiple fans to create a cross-breeze, enhancing airflow and speeding up drying.
Continuous Operation: Keep fans running for extended periods, especially in humid conditions, to maintain airflow and moisture reduction.
Monitor Humidity Levels
Monitoring humidity levels is essential for effective drying and dehumidifying after a flood.
Begin by using a hygrometer to measure the moisture in your environment. Aim for a humidity level below 60% to ensure ideal humidity control.
Regular moisture monitoring helps you track the progress of your drying efforts and adjust your dehumidification strategies accordingly. If humidity levels remain high, consider deploying dehumidifiers to absorb excess moisture.
Make certain to place them in areas with the highest humidity and keep windows and doors closed to maximize efficiency.
Check the hygrometer daily, and don’t hesitate to adjust your drying methods based on its readings.
This meticulous approach fosters a healthier environment, preventing mold growth and ensuring a safe home for you and your family.
Cleaning and Disinfecting Surfaces
As you begin the process of cleaning and disinfecting surfaces after a flood, it’s crucial to approach the task methodically to ensure all contaminants are effectively removed.
Flood damage can introduce harmful bacteria and mold, so thorough surface sanitation is critical to ascertain a safe environment.
Follow these steps:
Remove Debris: Clear any visible dirt or debris from affected surfaces.
Wash Surfaces: Use warm water and a mild detergent to scrub surfaces thoroughly.
Disinfect: Apply a commercial disinfectant or a mixture of bleach and water (1:10 ratio) to eliminate pathogens. Allow it to sit for at least 10 minutes.
Rinse and Dry: Rinse surfaces with clean water and dry completely to prevent mold growth.
Preventing Future Flooding Issues
To effectively prevent future flooding issues, you must assess your property’s vulnerabilities and implement protective measures.
Start by identifying areas prone to water accumulation, such as basements and low-lying landscapes. Utilize flood-proofing techniques like installing flood barriers or elevating critical utilities above potential water levels.
Next, focus on drainage system improvements; make certain your gutters and downspouts are clear and direct water away from your foundation.
Consider adding a French drain or a sump pump to manage excess water. Regularly inspect and maintain these systems to make certain they function correctly during heavy rains.
You should also landscape your yard strategically, using native plants and swales to divert water naturally.
Frequently Asked Questions
How Long Does It Take for Flood Water to Subside Naturally?
Flood water typically subsides within days to weeks, depending on flood duration factors like soil saturation, topography, and rainfall. Employing natural drainage techniques can expedite this process, helping you regain normalcy more quickly.
Can I Use a Regular Vacuum for Flood Water Removal?
Using a regular vacuum for flood water removal is like trying to catch fish with your bare hands; it’s ineffective. Instead, invest in a wet/dry vacuum designed for water extraction to handle the job efficiently.
What Should I Do if I Encounter Wildlife in Floodwaters?
If you encounter wildlife in floodwaters, maintain a safe distance, avoid provoking them, and report sightings to local authorities. Prioritize your wildlife safety by following flood precautions to ensure both your safety and the animals’.
How Can I Tell if My Home Has Structural Damage After Flooding?
You’ll find it amusing how a little water can lead to big problems. Conduct a thorough structural inspection and damage assessment, checking for cracks, sagging beams, or warped walls—trust your instincts, they’re usually right!
Are There Specific Health Risks Associated With Floodwater Exposure?
Yes, flood water poses significant health risks, including exposure to pathogens, chemicals, and debris. You could face infections, gastrointestinal issues, or skin irritations. Always take precautions and seek medical advice if you experience symptoms.
Review
Effectively managing flood water removal is essential for minimizing damage and ensuring safety. By following this guide, you can mitigate risks to your property and health. Remember to assess the situation, gather the right equipment, and prioritize safety throughout the process. With diligent cleanup and preventive measures, you can safeguard your home against future flooding events.