Did you know that the type of water involved in a damage incident—clean, gray, or black—can drastically change your water damage restoration approach? Understanding this can save you time and money. Evaluating the damage quickly is essential, but safety must come first. By mastering key techniques and tools, you can effectively manage restoration efforts. Discover how to navigate this process and prevent further complications.
Key Takeaways
- Identify Water Type: Assess whether the water is clean, gray, or black to determine the necessary restoration steps and urgency.
- Shut Off Utilities: Immediately turn off electricity, gas, and water supply to prevent hazards and further damage.
- Use the Right Tools: Equip yourself with moisture meters, extraction pumps, and industrial fans for efficient water removal and drying.
- Act Quickly: Remove standing water and dry surfaces within 24 hours to prevent mold growth and further complications.
- Regular Inspections: Conduct weekly checks for moisture and mold to catch issues early and maintain a safe environment.
Understanding Water Damage: Why Immediate Action Matters
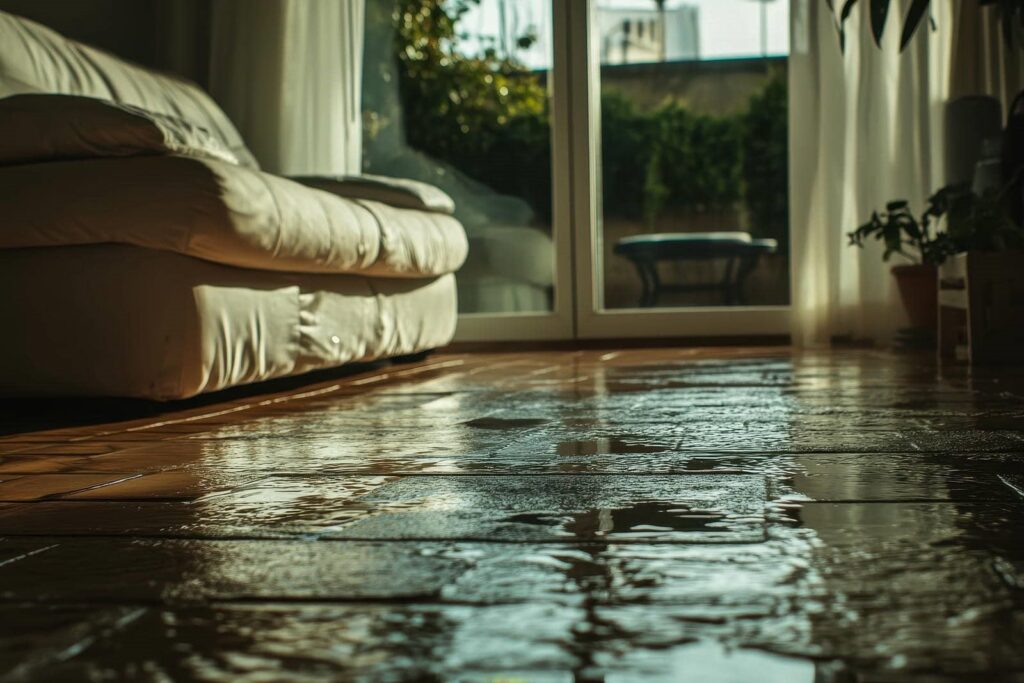
When water damage occurs, acting swiftly can make all the difference in the extent of the harm. Understanding the different water types—clean, gray, and black—is crucial for effective restoration.
Each type has a specific damage classification, influencing how you should respond. Clean water, from sources like broken pipes, poses minimal risk, while gray water, from appliances, can lead to health issues if not handled quickly.
Black water, from sewage or floodwaters, requires immediate professional intervention due to its severe hazards. By recognizing these distinctions, you can prioritize your actions and potentially save your property from extensive damage.
Assessing Damage: Identifying Affected Areas
After addressing the immediate threats posed by different types of water damage, your next step is to assess the affected areas of your property. A thorough damage assessment helps you identify which materials are compromised and require attention. Begin by inspecting walls, floors, and furniture. Look for discoloration, warping, or mold growth.
Here’s a quick reference table to guide you in your assessment:
| Area | Signs of Damage | Affected Materials |
|---|---|---|
| Walls | Stains, peeling paint | Drywall, insulation |
| Floors | Buckling, soft spots | Hardwood, carpet |
| Ceilings | Water stains | Drywall, plaster |
| Furniture | Warping, mold | Wood, upholstery |
| Appliances | Leaks, rust | Metal, plastic |
Identifying these issues early can save you time and money.
Shut Off Utilities: Keeping Your Home Safe During Cleanup
To ensure safety during cleanup, it’s crucial to shut off utilities before you begin any restoration efforts. Start by turning off the electricity at your main breaker to prevent electrical hazards.
Next, shut off the gas supply, as leaks can pose significant risks. If water is flowing, turn off the water supply to minimize further damage.
These utility safety measures are critical in protecting both yourself and your property. Follow emergency procedures by evaluating the situation carefully before re-entering your home.
Communicate with your family about these precautions to assure everyone’s awareness. By taking these steps, you’ll create a safer environment for effective cleanup and restoration, fostering a sense of security during this challenging time.
Essential Tools for Water Damage Restoration
Effective water damage restoration hinges on having the right tools at your disposal. To tackle the aftermath efficiently, moisture meters are vital; they help you accurately assess the extent of water intrusion and monitor drying progress.
With these devices, you can ensure no hidden moisture remains, preventing future mold issues. Additionally, extraction pumps are essential for removing standing water quickly.
These powerful machines can handle large volumes, allowing you to expedite the restoration process. Investing in high-quality moisture meters and extraction pumps streamlines your efforts and enhances your confidence in restoring your home effectively.
Equip yourself with these vital tools, and you’ll be well on your way to a successful restoration.
Effective Drying Techniques for Water Damage
Having the right tools sets the stage for successful water damage restoration, but employing effective drying techniques is equally important.
Start by using industrial fans and dehumidifiers to enhance airflow and reduce humidity levels. These drying methods help expedite the evaporation process, ensuring your space dries efficiently.
Regular moisture measurement is vital; use a moisture meter to monitor affected areas, ensuring you’re on top of any lingering dampness.
Pay special attention to hidden spaces like behind walls and under floors, as these areas can trap moisture.
How to Prevent Mold Growth After Water Damage
Although water damage can be a challenging problem, taking immediate action can greatly reduce the risk of mold growth. Focus on mold prevention by addressing moisture quickly. Start by drying affected areas within 24-48 hours. Use dehumidifiers to maintain humidity control, ideally below 60%.
Here’s a quick guide to help you:
| Action | Purpose | Timing |
|---|---|---|
| Remove standing water | Reduces moisture levels | Immediately |
| Dry surfaces | Prevents mold from settling | Within 24 hours |
| Use dehumidifiers | Controls humidity levels | Ongoing |
| Inspect regularly | Detects mold early | Weekly |
When Should You Consult Professionals for Water Damage?
If you notice structural damage, such as sagging ceilings or warped floors, calling in professionals is essential to assess the risk and ensure safety.
Additionally, if the water damage persists beyond 24-48 hours, the likelihood of mold growth increases, which is another reason to seek help.
Finally, if you feel overwhelmed or unsure about proper cleanup techniques, professionals can provide the expertise and equipment necessary for effective restoration.
Don’t hesitate; timely action can save you time, money, and stress.
Frequently Asked Questions
How Long Does Water Damage Restoration Typically Take?
Water damage restoration typically takes a few days to weeks, depending on the severity. The restoration timeline includes the drying process, which can vary based on materials and environmental conditions. Quick action speeds recovery markedly.
Will My Insurance Cover Water Damage Repairs?
Your insurance might cover water damage repairs, but it depends on your policy specifics. Check your coverage limits and any exclusions to ensure you’re fully informed about what’s included in your insurance policies.
Can I Handle Water Damage Cleanup Myself?
Yes, you can handle DIY cleanup, but prioritize safety precautions. Wear protective gear, ensure proper ventilation, and assess the damage thoroughly. If it’s extensive, consider professional help to avoid health risks and further complications.
What Are the Signs of Hidden Water Damage?
You’ll notice signs of hidden water damage through mold growth, musty odors, and warped surfaces. These issues can compromise your home’s structural integrity, so addressing them promptly is essential for maintaining a safe living environment.
How Can I Prepare for Potential Water Damage?
Are you ready for the unexpected? Prepare for potential water damage by investing in waterproofing solutions and assembling emergency kits. These steps protect your home and provide peace of mind for you and your family.
Conclusion
In the wake of water damage, you hold the reins to your home’s recovery. Like a sculptor chiseling away at rough stone, you can shape your space back to safety and comfort. By acting swiftly and utilizing the right tools, you create a fortress against future threats. Remember, mold is a silent intruder; vigilance is key. If the damage feels overwhelming, don’t hesitate to call in the experts. Your home deserves a second chance to shine.