
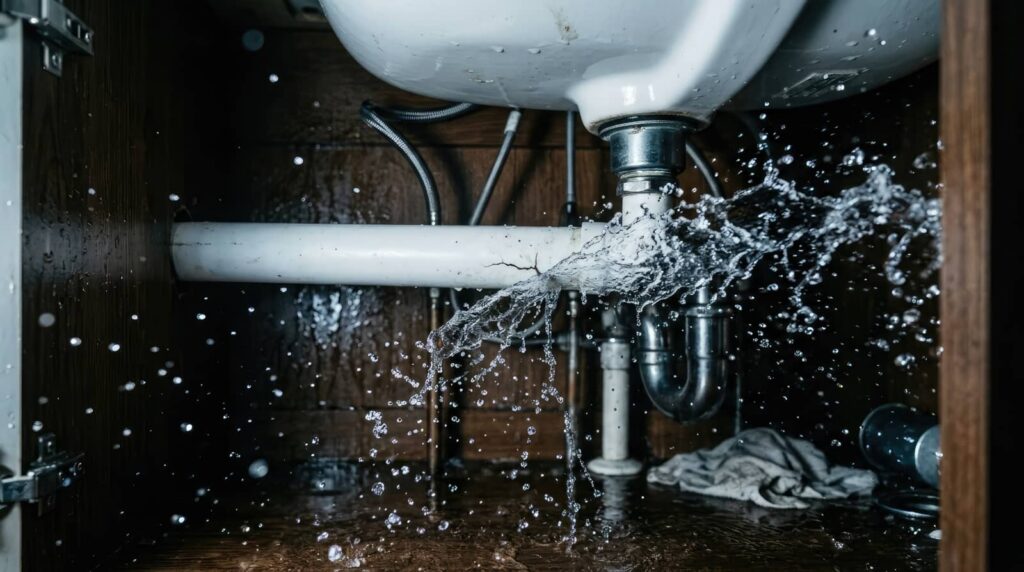
When a pipe bursts, Pipe Water Cleanup should begin as quickly as possible because your first moves matter most. You’ll need to stop the water, cut power to wet areas, and remove standing water before damage spreads. From there, you must evaluate what can be saved, dry hidden moisture, and sanitize affected surfaces to reduce mold and contamination risks. If the cleanup goes beyond surface damage, knowing when to bring in a restoration professional can protect both your home and your next steps.
Key Takeaways
- Shut off the main water valve immediately and turn off electricity to affected areas before entering wet rooms.
- Avoid standing water near outlets or appliances, and wear gloves, waterproof boots, and eye protection during cleanup.
- Remove standing water quickly with a wet/dry vacuum or pump, then ventilate the area to speed drying.
- Check nearby rooms, walls, and porous items for hidden moisture, and discard contaminated materials that cannot be safely restored.
- Call a licensed water damage professional for structural saturation, moisture monitoring, and a documented drying and restoration plan.
Shut Off the Water and Power
Start by shutting off the main water supply to stop more water from entering the damaged pipe and spreading through the area. Locate your home’s main valve, then turn it clockwise until it stops. If your system uses a lever, rotate it a quarter turn so it’s perpendicular to the pipe.
These water shutoff techniques quickly isolate the break and help your household stay in control.
Next, cut electrical service to affected rooms using your breaker panel. Identify the labeled circuit, switch it fully to OFF, and confirm connected fixtures no longer receive power.
If labels are unclear, turn off the main breaker to simplify the response. These power disconnection steps reduce system strain and support a coordinated cleanup process.
Stay Safe During Burst Pipe Cleanup
Before you begin cleanup, treat electrical hazards as the first priority and keep clear of any standing water near outlets, cords, or appliances.
You should confirm the power is off in affected areas before you step in or handle wet materials.
Then put on essential protective gear, including gloves, waterproof boots, and eye protection, so you can work safely and efficiently.
Electrical Hazards First
Because water can energize outlets, appliances, and wiring paths you can’t see, treat electrical hazards as the first priority during burst pipe cleanup.
Don’t step into standing water near plugged-in devices. If you can reach your main panel without crossing wet areas, shut off power there immediately. Switch individual circuit breakers only if the panel and floor are completely dry.
If the panel is wet, buzzing, warm, or damaged, stop and call your utility or a licensed electrician. Unplugging appliances in a wet zone can complete a dangerous path, so leave them alone until power is confirmed off.
Use a flashlight, not candles, while you assess conditions. Following these electrical safety steps helps protect everyone involved and keeps your cleanup team working from the same safe, confident starting point together.
Protective Gear Essentials
Once electrical risks are under control, put on protective gear that matches the conditions in the affected area. Start with protective gloves to block contaminants and reduce skin contact with dirty water, insulation fibers, or cleaning agents.
Add safety goggles to shield your eyes from splashes and airborne debris.
Wear waterproof boots with slip-resistant soles so you can move securely across wet flooring and uneven surfaces. If you notice odor, visible mold, or aerosolized particles, use face masks rated for cleanup work.
Change any soaked gear promptly to maintain protection and comfort. Before you enter, check each item for tears, poor fit, or damaged seals.
When you gear up carefully, you protect yourself and support the safe, coordinated cleanup approach your household or response team depends on daily.
Remove Standing Water Right Away
Start by extracting standing water as soon as it’s safe, since every hour of contact increases damage to flooring, baseboards, drywall, and nearby framing. Your quick response limits saturation, slows microbial growth, and gives your cleanup team a stronger starting point.
Use a wet/dry vacuum, submersible pump, or portable extractor, depending on depth and room size.
Work from the lowest point toward a drain or exit path, and keep power tools connected to protected circuits only. If water levels are shallow, use mops and absorbent towels to capture what machines miss.
Check adjacent rooms, closets, and floor changes, because standing water often travels farther than it first appears. As you remove it, ventilate the area to support evaporation and keep the cleanup process moving safely and efficiently.
Decide What to Keep or Throw Out
A practical sorting pass helps you separate salvageable items from materials that can’t be cleaned, dried, or safely restored. Work methodically so you can prioritize safety and make confident decisions that protect your home and your household.
- First, keep valuables in a clean, separate area and salvage documents, photos, and records as quickly as possible.
- Next, assess electronics carefully; if they were wet, don’t power them on until a qualified technician inspects them.
- Then, evaluate furniture by material, construction, and contamination level to determine whether restoration is realistic.
- Finally, check appliances for exposure, odor, and residue, and discard damaged porous items that may harbor bacteria.
As you sort, consider sentiment, but let health, function, and recoverability guide your choices. You’re creating order together after disruption.
Dry Floors, Walls, and Hidden Moisture
With sorting underway, focus on removing moisture from floors, walls, and concealed cavities before mold and structural damage take hold.
Start with moisture detection tools to identify hidden leaks, damp subfloors, and saturated wall insulation. You’ll get better results when you map wet zones and prioritize the most affected areas first.
Next, apply targeted drying techniques based on flooring materials and wall construction. Lift baseboards if needed, promote steady air circulation with fans, and use dehumidifiers for reliable humidity control.
Open access points carefully so trapped moisture can escape from cavities without spreading damage. Check readings daily until materials return to acceptable moisture levels.
Clean and Disinfect the Area
Remove residue and sanitize every affected surface once standing water is gone and materials are drying under control. You’ll protect your home best by cleaning first, then disinfecting with the proper dilution and contact time. This sequence supports sanitizing surfaces and effective mold prevention without spreading contamination.
- Wear gloves, eye protection, and shoes with good traction.
- Wash hard surfaces with detergent and warm water first.
- Apply disinfectant to nonporous areas and let it dwell fully.
- Bag porous debris that can’t be safely cleaned.
Wipe walls, baseboards, trim, and fixtures from top down to avoid recontamination. Rinse if label directions require it, then dry surfaces promptly with airflow.
As you work methodically, you’re restoring a safer space for everyone who shares your home together.
Call a Water Damage Pro When Needed
You should call a water damage professional when you detect structural saturation, persistent moisture readings, contamination concerns, or hidden water migration beyond the cleaned area.
If these conditions appear, act fast because rapid emergency response reduces material failure, microbial growth, and secondary damage.
To choose the right restoration expert, verify certification, response time, water extraction capability, and documented drying procedures.
Signs Professional Help Is Needed
If water has spread beyond a small, contained area, keeps returning, or has reached electrical systems, insulation, subflooring, or wall cavities, call a water damage professional right away.
You should also watch for water damage symptoms that signal hidden saturation and structural risk. A professional assessment helps your household choose the safest next step together.
- Persistent musty odors suggest moisture remains inside materials.
- Bubbling paint or warped trim indicates water migration behind surfaces.
- Soft flooring, sagging drywall, or stained ceilings point to compromised assemblies.
- Repeated meter movement after shutoff may reveal an active hidden leak.
When these signs appear, don’t rely on surface drying alone.
You need moisture mapping, containment planning, and material evaluation to protect your home correctly.
Getting expert help keeps your cleanup process organized, supported, safer, and fully informed.
Emergency Response Timing
When water enters wall cavities, spreads across multiple rooms, or nears electrical components, response time matters and a water damage professional shouldn’t be delayed. You’ll protect your home and everyone in it by acting within minutes, not hours.
Shut off the water source if you can do so safely, disconnect power to affected areas, and keep people away from saturated flooring.
Next, document visible damage, move dry belongings to a safe zone, and begin basic containment with towels or buckets.
If moisture continues migrating, odors appear, or ceilings sag, escalate immediately. These conditions signal hidden saturation that requires specialized drying and monitoring.
Choosing A Restoration Expert
Because hidden moisture can keep damaging framing, insulation, and finishes long after surface water is removed, choosing a qualified restoration expert is a practical next step once cleanup moves beyond simple drying.
You’ll protect your home and feel more confident when you hire someone who follows tested restoration techniques and documents every step.
- Verify licenses, insurance, and relevant expert qualifications.
- Ask how they map moisture and monitor drying progress.
- Confirm they use containment, air movement, and dehumidification correctly.
- Request a written scope, timeline, and post-drying verification.
A strong professional helps you move from uncertainty to control.
You deserve clear communication, respectful service, and evidence-based decisions.
If odors persist, materials swell, or readings stay elevated, call a water damage pro before concealed damage spreads further through your home and belongings.
Prevent Burst Pipes and Future Damage
To prevent burst pipes and limit future water damage, start by stabilizing your plumbing system after cleanup is complete. Check shutoff valves, inspect exposed lines, and confirm water pressure stays within manufacturer guidelines.
Schedule plumbing maintenance to replace weakened fittings, corroded sections, and failed seals before they rupture again.
Next, strengthen prevention. Add pipe insulation in unheated areas, especially crawl spaces, basements, garages, and exterior walls. Use leak detection devices near vulnerable fixtures and along supply lines so your household catches problems early.
Make winter preparation part of your routine: drain outdoor spigots, disconnect hoses, and keep indoor temperatures consistent to reduce the risk of frozen pipes.
If you’re unsure, bring in a licensed plumber. You’re protecting your home the smart, dependable way, together with good habits.
Frequently Asked Questions
How Long Do Insurance Claims for Burst Pipe Damage Usually Take?
You can expect most claims to take two to six weeks, though complex cases may run longer. You’ll speed the insurance process by documenting damage quickly, staying responsive, and tracking claim duration with your adjuster.
Can Burst Pipe Water Damage Affect Indoor Air Quality Later?
Yes, burst pipe water damage can affect your air quality later if moisture lingers. You should dry materials quickly, monitor humidity, and inspect hidden areas, because mold growth and particles can circulate through your shared indoor environment.
Will a Burst Pipe Increase Future Plumbing Repair Costs?
Yes—just when you’re organizing repair budgets, a burst pipe can raise future plumbing costs if you delay inspection. You’ll protect maintenance planning by finding hidden damage early, replacing weakened sections, and documenting repairs for consistent upkeep.
How Can Tenants Document Burst Pipe Damage for Landlords?
Document burst pipe damage by taking dated photo evidence, listing affected rooms and belongings, saving receipts, and requesting repair estimates. You’ll help your landlord assess losses quickly, and you’ll strengthen your record if disputes arise later.
What Signs of Structural Weakening Appear After Severe Pipe Leaks?
You’ll notice structural weakening through cracked walls, warped floors, sticking doors, sagging ceilings, and widening gaps at trim. You should document changes, monitor progression, and request a professional inspection quickly so your space stays safe and stable.
Conclusion
Act fast and you’ll limit both structural damage and health risks after a burst pipe. Shut off utilities, remove water, dry every surface, and disinfect thoroughly before rebuilding. If moisture may be trapped behind walls or under floors, bring in a restoration professional. That matters because mold can begin growing within 24 to 48 hours of water exposure. By following a clear cleanup process, you’ll protect your home, reduce repair costs, and lower the chance of future pipe failures.