
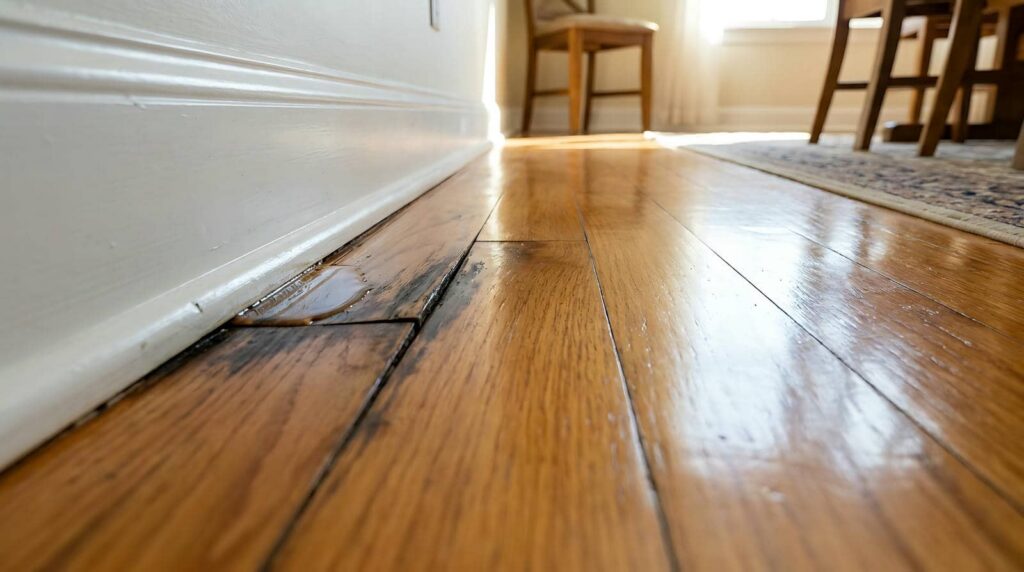
Burst Pipe Cleanup begins with quick action to limit water damage and protect your home. When a pipe bursts, shut off the water supply immediately and assess the affected areas. Using the right tools for water extraction and temporary repairs can help minimize damage until permanent repairs are made. Knowing when to handle the cleanup yourself and when to call restoration professionals can save you time, reduce repair costs, and prevent long-term structural and mold issues.
Key Takeaways
- Immediately turn off the water supply and contain leaks with buckets and towels to minimize damage.
- Use duct tape or a pipe clamp for temporary fixes until professional help arrives.
- Employ a wet/dry vacuum and fans to quickly remove standing water and reduce moisture.
- Document all damage with photos and repair estimates for insurance claims.
- Schedule regular plumbing inspections and ensure proper insulation to prevent future burst pipes.
Immediate Actions to Take After a Burst Pipe
When a pipe bursts, your immediate response can mitigate damage considerably.
First, grab your emergency supplies, including a bucket and towels, to contain the leak. Next, turn off the water supply to prevent further flooding.
If you can identify the burst section, use quick fixes like duct tape or a pipe clamp as a temporary measure until a professional arrives. Make sure to document the damage for insurance purposes.
Ventilate the area to reduce moisture and prevent mold growth. Finally, don’t hesitate to call a plumber; swift action can save you from costly repairs.
Common Causes of Burst Pipes and How to Identify Them
After addressing the immediate aftermath of a burst pipe, understanding the common causes can help you prevent future incidents.
Freezing temperatures can lead to ice formation in pipes, causing them to crack. Tree roots often invade underground pipes, disrupting their integrity. Aging pipes are more susceptible to failure due to wear and tear.
High water pressure can stress your plumbing system, leading to leaks. Corrosion issues weaken pipes over time, while poor insulation increases the risk of freezing.
Sudden temperature changes can also cause materials to expand and contract, making pipes more vulnerable. Finally, construction damage, whether from digging or heavy machinery, can compromise your plumbing system.
Identifying these factors early can save you from costly repairs.
Essential Tools for Cleaning Up Burst Pipes
Cleaning up after a burst pipe requires the right tools to ensure efficiency and safety. Start with a good-quality wet/dry vacuum to remove standing water quickly.
Moisture detection tools are crucial for identifying hidden damp areas that can lead to mold growth. Don’t forget protective gear, like gloves and masks, to assure your safety while working.
Pipe insulation is also essential; it helps prevent future bursts by maintaining temperature stability. Additionally, consider using fans and dehumidifiers to speed up the drying process.
Finally, have buckets and towels on hand for quick clean-up of smaller leaks. With these tools, you’ll be well-equipped to tackle the aftermath of a burst pipe effectively.
Step-by-Step Guide to Cleaning Up Water Damage
To effectively clean up water damage, you’ll want to act quickly and methodically. Follow these steps for efficient recovery:
Water Extraction: Use a wet/dry vacuum or a pump to remove standing water. The sooner you extract the water, the less damage you’ll have to deal with.
Drying Out: Set up fans and dehumidifiers to circulate air and dry affected areas. This step is essential for preventing mold growth.
Mold Prevention: Inspect for any remaining moisture and treat surfaces with mold-resistant solutions.
Ensure proper ventilation in the space to deter future mold issues.
When to Call a Professional for Burst Pipe Damage?
When should you consider calling a professional for burst pipe damage? If you notice signs of urgency, like water pooling rapidly or discolored walls, it’s time to act.
Evaluating damage quickly is essential; if you find structural issues or mold growth, don’t hesitate to reach out for help.
Professionals have the tools and expertise to handle extensive damage that may be beyond your skills. Additionally, if you’re unsure about the extent of the issue or how to proceed safely, expert guidance is invaluable.
Ignoring these problems can lead to more significant issues down the line, including costly repairs.
How to Prevent Burst Pipes in Your Home
While you can’t control every factor that leads to burst pipes, there are several proactive steps you can take to minimize the risk in your home.
Start with proper pipe insulation, especially in unheated areas. This will help maintain a consistent temperature and protect against freezing.
Next, commit to seasonal maintenance. Regularly inspect your plumbing and address any leaks or corrosion before they escalate.
Finally, keep your home’s temperature stable during cold weather.
Here’s a quick checklist:
- Insulate pipes in crawl spaces and attics.
- Inspect plumbing quarterly for signs of wear.
- Maintain indoor temperature above 55°F in winter.
How to Assess Water Damage After a Burst Pipe?
After a burst pipe, you need to quickly identify the affected areas in your home to prevent further damage.
Check for water stains, warping, or mold growth, as these can indicate serious issues.
Next, evaluate the structural integrity of walls and floors to ensure they can support your space safely.
Identify Affected Areas
How can you effectively assess water damage after a burst pipe? Start by identifying the affected areas to prevent further issues. Here’s how:
Inspect Surrounding Surfaces: Check walls, floors, and ceilings near the burst pipe. Look for discoloration, peeling paint, or warping.
Evaluate Pipe Insulation: Verify the insulation around the pipe isn’t compromised. Damaged insulation can lead to future leaks and requires seasonal maintenance.
Check for Mold Growth: Look in hidden spaces like behind appliances or inside cabinets. Early detection is key to preventing health risks.
Evaluate Structural Integrity
Once you’ve identified the affected areas, the next step is to evaluate the structural integrity of your property.
Begin by inspecting walls, ceilings, and floors for signs of warping or mold, which can indicate significant water damage. Check the condition of pipe insulation; if it’s deteriorated, it may compromise your plumbing system.
Assess any visible support beams and joists for weakness or rot. Remember, effective pressure regulation can prevent future bursts, so make sure your system is functioning properly.
If you notice extensive damage, consulting a professional is essential. A thorough evaluation will help you understand the extent of the damage and guide you in making informed repair decisions.
Prioritize safety and structural soundness to protect your home.
Common Mistakes to Avoid in Pipe Repairs
When repairing burst pipes, it’s essential not to ignore the value of professional help.
Many DIY enthusiasts underestimate the importance of using the right materials, which can lead to further issues down the line.
Avoiding these common mistakes can save you time and money in the long run.
Ignoring Professional Help
While tackling a burst pipe might seem manageable, ignoring the need for professional help can lead to costly mistakes. Relying solely on DIY repairs often results in temporary solutions that don’t address underlying issues.
Here are three common pitfalls to avoid:
Neglecting Risk Assessment: Skipping a thorough evaluation can result in further damage and increased cost implications.
Overlooking Preventive Measures: Professionals can identify risks and recommend long-term strategies to avoid future incidents.
Inadequate Material Selection: Using improper materials might save money initially but could lead to significant homeowner responsibilities and repairs down the line.
Investing in professional assistance ensures a thorough approach to pipe repair, safeguarding your home for the long haul.
Using Improper Materials
Common mistakes include using low-quality materials that weaken the structure, resulting in leaks and further damage. Improper insulation may lead to freezing pipes, while incorrect fittings can create pressure issues, ultimately causing ruptures.
Furthermore, inadequate sealing allows moisture to escape, promoting mold growth and structural decay. To ensure a reliable repair, always select high-quality materials tailored to your specific plumbing needs.
Consult professionals when in doubt; it’s better to invest in the right tools than to face costly repairs later on. Prioritizing proper materials fosters a secure and functional plumbing environment for your home.
Navigating Insurance Claims for Water Damage
Managing insurance claims for water damage can feel overwhelming, especially when you’re dealing with the aftermath of a burst pipe.
To streamline the claim process, follow these steps:
Review Your Policy: Understand your insurance coverage, including policy limits and specific water damage clauses.
Gather Documentation: Keep track of all documentation requirements, such as photos of damage, repair estimates, and any receipts related to the incident.
Communicate with Your Adjuster: Maintain clear communication with your adjuster to set timeline expectations and ensure you meet all filing deadlines.
Frequently Asked Questions
Can I Use a Hair Dryer to Dry Wet Areas?
Yes, you can use a hair dryer to dry wet areas. Its effectiveness varies; combine it with other drying techniques for best results. Keep the dryer moving to avoid overheating and damaging surfaces.
How Long Does It Take for Mold to Develop After Water Damage?
In as little as 24 to 48 hours after water damage, mold growth can begin. If you don’t act quickly, the hidden dangers can spread, turning your home into an unwelcome environment.
Will My Homeowner’s Insurance Cover Burst Pipe Repairs?
Yes, your homeowner’s insurance often covers burst pipe repairs, but check your policy for specific coverage limits. Filing insurance claims promptly can ensure you receive the necessary funds to address the damage effectively.
What Are the Signs of Hidden Water Damage?
When it rains, it pours. Look for water stains on ceilings or walls and sniff for musty odors. These signs often indicate hidden water damage, which could lead to bigger problems if you ignore them.
Can I Prevent Burst Pipes With Insulation?
Yes, you can prevent burst pipes with insulation. Proper pipe insulation and winter precautions, like sealing drafts, reduce freezing risks, helping you maintain a warm, safe home and avoid costly water damage in colder months.
Summary
In the aftermath of a burst pipe, swift action is crucial. By turning off the water supply and using essential tools, you can mitigate damage effectively. However, the truth is that while temporary fixes may seem adequate, ignoring professional help can lead to costly mold growth and structural issues down the line. Prioritizing preventive measures and understanding the risks associated with burst pipes will protect your home and save you money in the long run.