
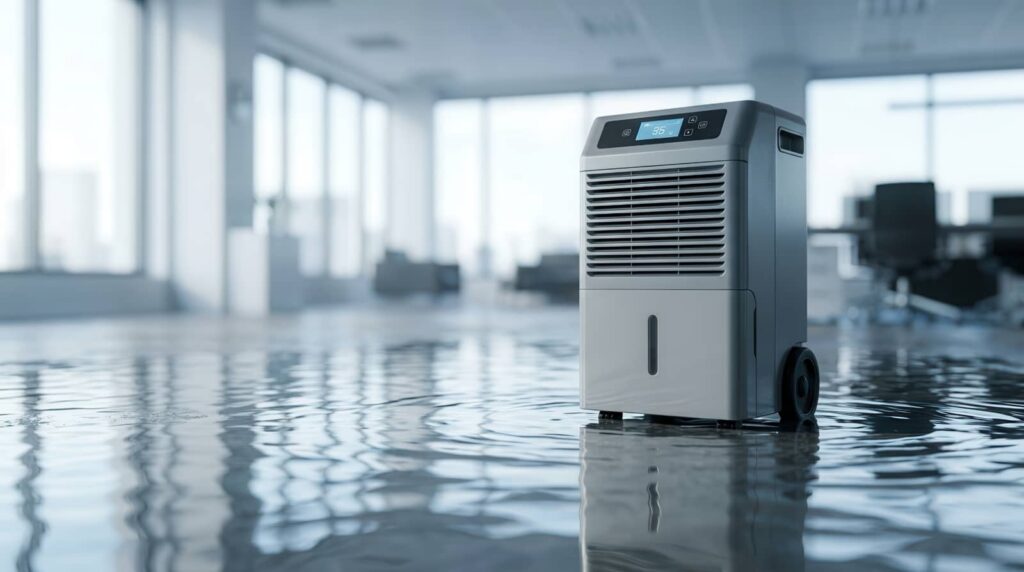
After water damage, every hour can feel like your building is dissolving from the inside out. You need to stop the water source, verify safety, remove wet materials, and set up the best dehumidification with the right capacity and airflow. You’ll also need to track humidity, check for hidden moisture, and maintain the equipment daily. Miss one step, and drying can stall in places you can’t see.
Key Takeaways
- Stop the water source first, then shut off power in affected areas before starting any drying or dehumidification equipment.
- Remove wet belongings and porous materials quickly to reduce moisture load and prevent mold or contamination.
- Use the right-sized dehumidifier for the room, temperature, and material saturation to improve drying efficiency.
- Place dehumidifiers near the wettest areas and use fans to move air steadily across damp surfaces.
- Monitor humidity and moisture readings daily, maintain equipment, and call professionals if hidden moisture or drying delays persist.
Stop the Water Source First
Before you run dehumidifiers or fans, stop the incoming water so the affected area can actually begin drying. If water keeps entering, humidity stays elevated, materials stay saturated, and your drying plan stalls. Your first job is isolating the water source fast. Shut off the nearest supply valve, appliance valve, or main line, depending on where the intrusion began.
Then confirm the flow has stopped. Use basic leak detection steps: inspect supply lines, fittings, drain connections, and visible cracks; check for active drips, pressure loss, or meter movement.
If the source isn’t obvious, document what you see and call a restoration professional or licensed plumber. Acting quickly protects drywall, insulation, flooring, and framing, and it helps everyone involved move from crisis into a clear, coordinated recovery process together.
Check Safety Before Water Damage Drying
Once you’ve stopped the water source, verify that the area is safe to enter and dry.
Before you begin dehumidification, shut off power to affected zones at the breaker if water may have reached outlets, cords, or appliances. Electrical hazards can persist even when surfaces look dry, so don’t assume conditions are stable.
Wear appropriate safety equipment, including gloves, boots, and respiratory protection if you detect odors, silt, or suspected contamination.
Check for health risks such as sewage, chemical residue, or visible microbial growth.
Then assess structural integrity: look for sagging ceilings, warped flooring, loose drywall, or compromised support members.
If you see cracking, shifting, or severe saturation, stop and call a qualified professional.
Taking these steps protects you and helps everyone in your home recover confidently, together, and safely.
Remove Wet Items After Water Damage
Remove salvageable belongings first so you can reduce moisture load and prevent additional damage.
Separate soaked materials by type and saturation level, since hard surfaces, fabrics, and insulation require different drying or disposal steps.
Clear out porous items that can’t be fully dried, because they retain water, slow dehumidification, and increase contamination risk.
Prioritize Salvageable Belongings
Because wet materials keep releasing moisture into the air, you should prioritize salvageable belongings as soon as it’s safe to enter the affected area.
Start with a fast belongings assessment so you can reduce moisture load and protect items that still fit your daily life. Focus your salvage priorities on nonporous valuables, important documents, electronics, and washable textiles with limited saturation.
Use gloves, photograph each item for records, and move recoverable belongings to a dry, ventilated staging zone. Elevate them off the floor to improve airflow and prevent additional absorption.
Check for structural distortion, surface contamination, and finish failure before deciding what merits immediate attention. This disciplined approach helps you stabilize humidity faster while preserving the possessions that support your routine, identity, and sense of home after a disruptive loss.
Separate Soaked Materials
Start by separating soaked materials from damp or dry contents so you can control evaporation and limit secondary damage. Group items by moisture level, material type, and location. This sorting lets you stabilize humidity zones, reduce cross-contamination, and support faster moisture reduction throughout the affected area.
Move saturated contents to a designated staging space with airflow and floor protection. Keep damp items nearby for separate monitoring, and leave dry contents outside the work zone.
Use bins, labels, or tarps so everyone on your team follows the same process. This organization improves dehumidifier performance because you won’t keep reintroducing excess moisture into partially dried rooms.
It also helps you apply appropriate drying techniques to each category, document conditions accurately, and maintain an orderly recovery workflow from start to finish daily.
Clear Out Porous Items
Two categories of porous items need immediate attention after water damage: materials you can dry quickly and materials you should discard. You should remove rugs, upholstery cushions, clothing, and paper goods from the affected area at once.
Porous materials trap water deep inside fibers, increasing moisture retention and delaying the restoration process.
Use targeted drying techniques on salvageable items: elevate them, separate layers, and expose all surfaces to strong air circulation and drying equipment. If an item stays saturated, smells musty, or shows discoloration, prioritize item replacement instead of risky reuse.
Mattresses, insulation, stuffed toys, and swollen particleboard usually fall into the discard category because they resist complete drying. Acting decisively supports mold prevention, protects indoor air quality, and keeps your cleanup effort aligned with professional standards and community expectations.
Check for Hidden Water Damage
You should inspect concealed moisture behind walls, under flooring, and inside cabinets because trapped water will slow dehumidification and extend material damage.
Use moisture meters, thermal imaging, or careful visual checks to identify damp areas you can’t see directly.
You should also watch for structural warning signs such as swelling, warping, staining, soft spots, or separated joints, since these indicate deeper water intrusion.
Inspect Concealed Moisture
Because moisture often migrates beyond the visible wet area, inspect concealed spaces early to catch hidden water damage before it fuels mold growth or material failure. Use moisture detection tools to scan wall cavities, subfloors, behind baseboards, and under cabinets. You’ll identify hidden leaks faster and limit contamination spread.
Check insulation concerns in exterior walls and attic edges, since wet insulation traps moisture and slows drying. Review flooring issues by testing beneath pad, under vinyl seams, and around thresholds where water lingers.
Open access panels near plumbing chases and inspect ventilation systems for damp duct insulation or condensate buildup. When you document readings room by room, you create a clear drying map your team can trust. That shared process helps protect indoor conditions, material performance, and long-term structural integrity for everyone involved.
Spot Structural Warning Signs
Subtle movement often signals hidden water damage before stains appear, so watch for structural changes that suggest prolonged moisture exposure. Check baseboards for swelling, hardwood for cupping, drywall for soft spots, and door frames for misalignment. These warning signs help you assess whether moisture has compromised structural integrity behind finished surfaces.
You should also inspect ceilings for sagging, corners for hairline cracks, and flooring for sponginess underfoot.
Use a moisture meter to support dampness detection in suspect areas, especially near plumbing lines, exterior walls, and subfloors. If fasteners show rust or trim separates from the wall, don’t ignore it. Those shifts often indicate ongoing saturation and can accelerate mold growth.
Choose the Right Dehumidifier
Although airflow and temperature affect drying speed, the dehumidifier determines how quickly moisture leaves the air after water damage. You’ll get better results when you match dehumidifier types to the loss category, room volume, and material load.
Refrigerant units work well in warm, humid spaces, while desiccant models perform better in cooler conditions or dense assemblies.
You should also verify sizing requirements before choosing equipment. Check the affected square footage, ceiling height, and estimated grains of moisture per pound of air.
High-capacity units remove moisture faster, but oversizing can waste power if conditions don’t support efficient operation. Look for models with continuous drainage, humidistat control, and clear extraction ratings.
When you choose equipment based on conditions instead of guesswork, you join professionals who dry structures methodically, safely, and confidently.
Place Dehumidifiers for Faster Drying
Selecting the right unit is only part of the drying plan; placement determines how effectively it captures airborne moisture and supports evaporation from wet materials. Position your dehumidifier near the wettest zone, but keep clearance around intake and exhaust grilles so moisture-laden air can circulate freely. That balance improves extraction efficiency and prevents short cycling.
For ideal placement, elevate the unit slightly when safe, especially in rooms with saturated carpet or uneven flooring. Keep doors to affected areas closed so you’re treating a defined air volume instead of the whole house.
In multiroom losses, place units to create drying zones, starting with spaces showing the highest moisture readings. Monitor condensate drainage and power access before final setup.
With deliberate placement and airflow enhancement, you’ll dry materials faster and keep your recovery team aligned.
Use Fans Without Slowing Drying
Two airflow rules matter most after water damage: move damp air across wet surfaces, and don’t blast materials so aggressively that you spread contamination or slow evaporation.
Use fans to create steady, directional air circulation, not a wind tunnel. Aim airflow parallel to walls, floors, and contents so boundary-layer moisture lifts away without forcing water deeper into porous materials.
Your fan placement should support the dehumidifier’s intake path. Set fans several feet from wet surfaces, angle them low, and overlap coverage instead of pointing multiple units at one spot.
In contained areas, position one fan to feed air out of corners and another to keep movement continuous across the room. If sewage or mold may be present, don’t use high-velocity fans until remediation professionals clear the area.
That keeps your restoration team safer, aligned, and effective.
Monitor Humidity and Moisture Daily
You need to check indoor humidity every day to confirm your drying plan is working.
Use a hygrometer and moisture meter to track air moisture and material moisture levels with consistent readings.
If humidity or moisture stops dropping, you can adjust dehumidifiers, airflow, or equipment placement before hidden damage worsens.
Daily Humidity Checks
Because humidity can rebound quickly after extraction, check indoor relative humidity and material moisture at least once each day to verify that drying is progressing. Use a calibrated thermo-hygrometer for accurate humidity measurement, and record readings at the same time daily so you can spot changes fast.
You’ll stay aligned with the drying team when you compare readings across affected rooms, closed cavities, and adjoining spaces. Aim to keep relative humidity within the restoration target set for your project, since elevated levels can slow evaporation and support secondary damage.
If readings rise, adjust dehumidifier runtime, airflow direction, or room containment immediately. This disciplined moisture management routine helps you confirm that conditions remain stable, controlled, and consistent with professional drying goals.
Daily checks also strengthen your documentation if questions arise later.
Track Moisture Levels
Consistent monitoring keeps your drying plan on course after water damage. You need daily readings, not guesses, because trapped moisture can linger behind walls, under flooring, and inside framing.
Use a hygrometer to verify indoor relative humidity and a moisture meter for direct moisture measurement in affected materials.
Record each reading at the same time every day. That routine helps you spot plateaus, identify hidden wet zones, and confirm whether your dehumidifiers and air movers are delivering effective humidity control.
Compare readings across rooms, especially near exterior walls, baseboards, and previously saturated areas. If numbers stop improving, reposition equipment or inspect for concealed water.
Empty Tanks and Clean Filters
Two maintenance tasks keep a dehumidifier working efficiently after water damage: empty the collection tank before it reaches capacity and clean or replace the air filter on the schedule recommended by the manufacturer.
Consistent tank maintenance prevents automatic shutdowns that interrupt moisture control. Prompt filter cleaning protects airflow, supports air circulation, and preserves equipment efficiency.
Check the bucket seal, drain port, and float switch during regular inspections so the unit runs reliably. Keep dehumidifier placement clear of walls, furniture, and debris to reduce intake restriction.
Then confirm the fan speed and humidity target match the manufacturer’s ideal settings for the room size and damage level. These simple steps help your drying setup perform like a coordinated system, giving you dependable results and a stronger sense that you’re handling recovery the right way.
Call a Pro if Drying Stalls
Even with proper tank and filter maintenance, drying can stall when moisture remains trapped in wall cavities, subfloors, insulation, or HVAC runs. If readings stop improving, you shouldn’t keep guessing. Bring in a restoration specialist for a professional assessment before hidden moisture drives mold growth, odor, or material failure.
A qualified team uses calibrated meters, thermal imaging, and a structured moisture evaluation to map wet zones you can’t see. They’ll confirm whether your dehumidifier capacity, airflow, and temperature are adequate for the affected area.
If needed, they can set containment, remove unsalvageable materials, and apply targeted drying equipment. Acting early helps you stay aligned with best practices and protects your home from secondary damage. You’re not overreacting—you’re doing what responsible property owners do.
Frequently Asked Questions
Can Dehumidifiers Remove Smoke Odor After Water Damage?
Yes, you can reduce smoke odor with dehumidifiers, but they won’t handle complete smoke removal or odor elimination alone. You’ll need ventilation, HEPA filtration, and surface cleaning too, so your space feels clean, safe, and restored.
Will My Insurance Cover Electricity Costs for Drying Equipment?
Sometimes, yes—because floods apparently bring bonus utility bills. You should review your insurance policies: many cover temporary drying equipment electricity when documented as mitigation. Ask your adjuster, keep receipts, and confirm policy limits immediately.
How Long Should I Wait Before Repainting Dried Walls?
Wait at least 24–48 hours after moisture readings match normal levels before repainting. You’ll get better results if you prioritize wall preparation, verify dryness thoroughly, and use proper repainting techniques that your restoration community trusts.
Can Houseplants Increase Humidity During the Drying Process?
Plant-packed spaces can increase humidity slightly during drying, so you shouldn’t rely on houseplants benefits now. You need strict humidity balance: move plants elsewhere, monitor relative humidity, and keep ventilation and dehumidification running consistently.
Should Pets Stay Elsewhere During Water Damage Restoration?
Yes, you should relocate pets during restoration; they’re vulnerable to noise, airborne particulates, chemicals, and escape risks. Arrange temporary pet care, follow safety precautions, and return them only after technicians confirm stable, dry, habitable conditions.
Summary
Act fast and stay methodical after water damage. Stop the source, verify safety, remove wet contents, and target hidden moisture before you set dehumidifiers and fans. Match equipment to the space, track humidity daily, and keep filters and tanks clean so drying stays efficient. Your goal is to bring materials back to a stable moisture range like a sponge returning to shape. If readings stop improving, don’t wait—bring in a restoration professional to prevent mold and structural damage.