
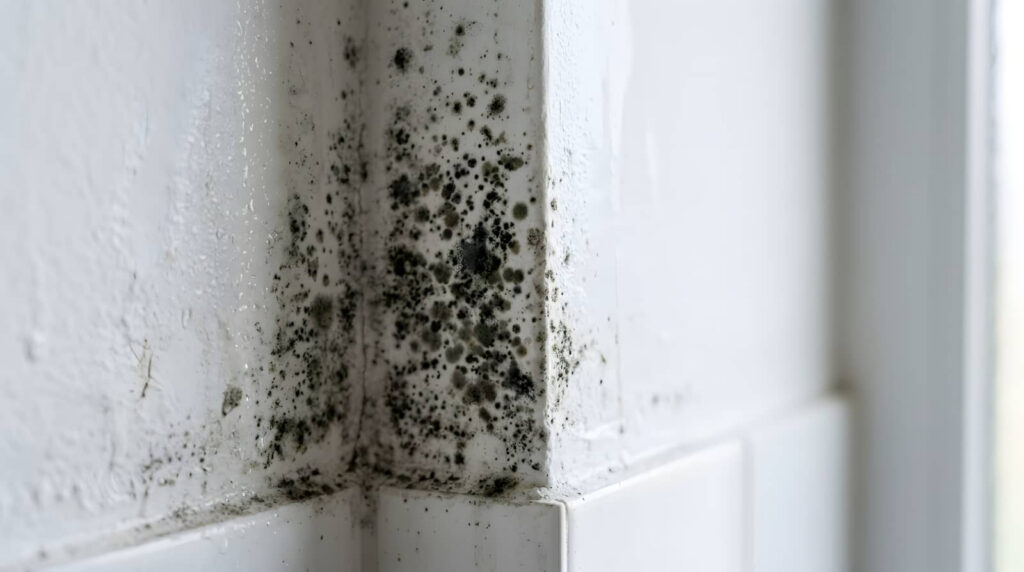
After water damage, you need to act fast because mold can begin growing within 24 hours. Water Damage Mold can become a bigger problem if moisture is not addressed quickly, so stop the leak, isolate the affected area, and start drying it with airflow and dehumidification. Then assess how far moisture and mold have spread, including behind walls and under flooring. Some cleanup is manageable, but larger or contaminated areas can create serious health and structural risks. The next steps determine whether you contain the problem or make it worse.
Key Takeaways
- Stop the water source, shut off electricity in wet areas, and remove standing water immediately to reduce damage and mold growth.
- Inspect walls, baseboards, flooring edges, and insulation for visible or hidden moisture using photos, notes, and a moisture meter.
- Dry the area within 24 hours using fans, ventilation, and dehumidifiers to keep indoor humidity below 60 percent.
- Remove and seal porous materials like wet carpet or drywall, and clean hard surfaces with detergent and water.
- Call a mold remediation professional for contamination over 10 square feet, sewage exposure, HVAC involvement, or persistent dampness after 48 hours.
Stop the Leak Before Mold Spreads
If water is still entering the area, stop the source immediately to limit structural damage and slow mold growth. Shut off the nearest valve, isolate electricity if outlets are wet, and keep everyone clear of slippery surfaces. Your first priority is control, because every extra minute of exposure increases saturation and contamination risk.
Next, identify hidden water sources with systematic leak detection. Check supply lines, appliance hoses, roofing penetrations, HVAC drains, and wall cavities for active seepage. Use towels or containment bins only after you’ve stopped the flow.
Document affected areas, then remove standing water with a wet vac or pump. Open interior doors to improve airflow and reduce trapped moisture. When you act quickly and methodically, you protect your home and support everyone depending on this space daily.
Know When Mold Is Unsafe
Although some spotting looks minor at first, mold becomes unsafe when it covers more than about 10 square feet, returns after cleaning, or appears in HVAC ducts, insulation, or porous materials that stayed wet for over 24 to 48 hours.
You shouldn’t rely on color or odor alone, because different mold types can look harmless while still creating serious health risks. If anyone in your home has asthma, allergies, immune suppression, or breathing symptoms, treat visible growth as a safety issue immediately.
You also need caution when water came from sewage, floodwater, or long-standing contamination, since those sources often carry extra biological hazards. In those cases, your safest move is to stop handling it yourself, limit contact, and bring in qualified remediation help so your household stays protected together.
Check How Far the Mold Spread
Before you decide whether cleanup is manageable, map the full extent of the mold and moisture, not just the stains you can see. Inspect baseboards, drywall seams, insulation, flooring edges, cabinets, and HVAC vents. Use a flashlight and moisture meter if available.
Check both sides of walls when possible, because mold growth often spreads behind finishes first. Measure the affected area and note any musty odor, warping, or soft materials.
Small, isolated patches are different from contamination running through wall cavities or under flooring. Don’t assume all mold types look black or fuzzy; some appear white, gray, or green. Document what you find with photos and notes so everyone helping you follows the same safety plan.
If spread reaches multiple rooms, hidden spaces, or porous materials, escalate quickly.
Dry the Area Within 24 Hours
Once you’ve identified the full spread, start drying the area immediately and aim to get materials dry within 24 hours to limit mold growth and further structural damage.
You’ll protect your home and everyone in it by acting methodically:
Increase airflow with targeted ventilation techniques, including cross-breezes and exhaust fans, if conditions outside are drier.
Start using the dehumidifier early, and monitor humidity so you keep indoor levels below 60 percent.
Open cavities only if it’s safe, and keep electricity off in wet zones until a qualified professional clears them.
Wear gloves, eye protection, and an N95 if spores may be present.
Document moisture readings as you go so your team stays aligned on progress. Fast, controlled drying helps you stabilize the space and reduce the chance of recurring mold.
Remove Water-Damaged Materials
Remove porous materials that stayed wet too long or can’t be fully cleaned and dried, such as carpet pad, insulation, ceiling tile, drywall, and particleboard.
Cut back damaged sections until you reach dry, sound material. Bag debris immediately in heavy-duty plastic, seal it tightly, and move it outside to limit spore spread through your shared living space.
Wear gloves, eye protection, and an N95 or better respirator before handling debris.
Shut off electricity to affected areas, and watch for sagging ceilings or weakened floors. Use proven water extraction methods first, then separate salvageable items from waste.
These early mold removal techniques help you protect your home and everyone in it.
If materials smell musty, crumble, delaminate, or stay above safe moisture levels, don’t keep them—remove and replace them.
Clean Hard Surfaces Safely
Scrub hard, nonporous surfaces such as metal, glass, sealed wood, and solid plastic with hot water and detergent, then rinse and dry them completely.
Wear gloves, eye protection, and an N95 so you protect yourself while keeping your home healthy for everyone inside. Use safe cleaning products that don’t mix ammonia and bleach. Effective mold removal techniques rely on friction, contact time, and complete drying.
Contain residue: Wipe from clean areas toward dirty areas to limit spread.
Disinfect correctly: Follow label dwell times exactly; shortcuts reduce effectiveness.
Dry thoroughly: Use fans and dehumidifiers so moisture doesn’t return.
You’re not just cleaning surfaces; you’re restoring a safer shared space.
Stay methodical, bag used cloths promptly, and wash your hands after each cleaning round.
Decide If You Can DIY Cleanup
Before you handle cleanup yourself, assess how far mold has spread and whether water reached porous materials or hidden cavities.
Check for active electrical hazards, structural instability, contaminated water, and poor air quality, since these risks can make DIY work unsafe fast.
If the damage exceeds a small, contained area or any hazard isn’t fully controlled, call a qualified restoration professional.
Assess Mold Spread
How far the mold has spread determines whether you can handle cleanup yourself or need a remediation pro. Start with mold identification techniques: map visible growth, note musty zones, and check nearby materials for staining, warping, or soft spots.
Small, isolated areas are often manageable; widespread growth behind walls or across multiple rooms usually isn’t. Your goal is to judge extent, not treat yet.
- Measure the affected area and track whether growth stays under roughly 10 square feet.
- Inspect porous materials like drywall, carpet, and insulation; deep contamination spreads farther than the surface shows.
- Document moisture patterns, room boundaries, and recurring odor because hidden spread increases the impact on health.
You’re not overreacting by evaluating carefully. This step helps you protect your home and make the right call.
Check Safety Risks
Even if the affected area looks small, you still need to check for hazards that make DIY cleanup unsafe. Start by shutting off electricity to wet rooms and avoiding contact with outlets, cords, or appliances. Confirm the water source isn’t sewage or chemical runoff, since both can contain hazardous materials.
Next, inspect for structural weakness. Soft drywall, swollen flooring, sagging ceilings, and loose tiles can fail under your weight. Check for sharp debris, broken glass, and hidden nails before you step in.
You should also watch for strong odors, which may signal contamination or poor ventilation. Use proper safety equipment, including gloves, eye protection, boots, and an N95 respirator.
When you protect yourself first, you’re following the same disciplined approach trusted by careful homeowners everywhere today.
Know When To Call
Once you’ve checked the immediate hazards, decide whether the damage stays within a safe DIY scope or requires a professional water damage restoration service. You protect your home best when you know your limits and act early.
DIY only if the damage is small. If the affected material is under about 10 square feet, clean water caused it, and drying began within 24–48 hours, you can usually proceed safely.
Call pros for hidden or contaminated damage. Sewage, soaked insulation, warped drywall, HVAC exposure, or persistent odors demand advanced drying, containment, and mold identification techniques.
Stop if your body reacts. Practice health symptoms awareness: coughing, wheezing, headaches, eye irritation, or skin issues mean exposure may be escalating.
You’re not overreacting by calling experts; you’re protecting everyone under your roof.
When to Call a Mold Remediation Pro
You should call a mold remediation pro if you see visible growth, smell persistent musty odors, or suspect hidden moisture behind walls or under flooring.
If contamination covers a large area, involves HVAC systems, or follows sewage or long-term water exposure, don’t handle it yourself because the health and containment risks increase fast.
You’ll also need to choose qualified remediation experts who use proper containment, air filtration, and moisture verification before clearance.
Signs You Need Help
When should you call a mold remediation pro after water damage? You should act fast when warning signs point beyond routine cleanup. A qualified pro helps protect your home, your air, and everyone who shares the space with you.
Different mold types spread differently, and health effects can start before growth looks dramatic. Watch for these signs:
- You smell a persistent musty odor after drying and cleaning.
- You see discoloration returning on drywall, trim, or around HVAC vents.
- You notice coughing, throat irritation, headaches, or worsening allergies indoors.
You also need help if moisture readings stay elevated, materials remain damp after 48 hours, or hidden cavities may be wet.
Early assessment limits cross-contamination, supports safe drying, and keeps your household on the same recovery path together.
Severe Contamination Cases
Some situations go beyond routine cleanup and require a licensed mold remediation pro immediately. If contamination covers more than about 10 square feet, returns after cleaning, or follows black water exposure, don’t disturb it.
Hidden growth inside HVAC systems, wall cavities, insulation, or subflooring also demands professional containment and removal procedures.
You should call a pro when occupants have asthma, immune suppression, pregnancy concerns, or worsening symptoms indoors. A proper health impact assessment helps determine urgency and exposure control steps for everyone in your household.
Professionals also use advanced mold identification techniques to distinguish active colonies, moisture pathways, and structural involvement. If you see sagging materials, strong musty odor, or widespread staining, treat the area as unsafe.
Acting quickly protects your home and your people together.
Choosing Remediation Experts
If the damage exceeds basic drying and surface cleaning, hire a licensed mold remediation professional with documented training, liability coverage, and written containment procedures. You need an expert when contamination spreads beyond 10 square feet, HVAC systems are involved, or occupants have symptoms.
Qualified teams identify mold types, isolate work zones, and verify remediation methods with moisture readings and post-remediation clearance.
Ask for certifications, insurance, and a clear scope that defines containment, PPE, disposal, and drying goals.
Request inspection data, including moisture mapping, affected materials, and criteria for salvage versus removal.
Confirm they’ll protect your household with negative air, HEPA filtration, and communication you can trust.
You deserve a crew that treats your home like a shared safety zone, not just another job.
Protect your community.
Document Mold Damage for Insurance Claims
Because insurers need clear proof of mold-related loss, document damage as soon as you can do so safely. Wear gloves, eye protection, and an N95 before entering affected rooms.
Take wide, medium, and close photos of visible growth, water lines, damaged materials, and appliance leaks. Record dates, room locations, odor strength, and moisture meter readings if available.
Save remediation estimates, inspection reports, hotel receipts, and emergency repair invoices in one folder. These mold documentation tips help you show scope, cause, and timeline during the insurance claim process.
Create a simple inventory listing damaged furniture, finishes, and personal items with approximate purchase dates and values. If adjusters or contractors visit, log names, times, and what they observed.
Clear records help your household feel prepared, supported, and taken seriously together.
Prevent Mold After Water Damage Returns
If water returns, you must dry affected materials within 24 to 48 hours to reduce mold risk and limit structural damage.
Use air movers, dehumidifiers, and controlled ventilation, and isolate wet areas if contamination is possible.
Then set a moisture monitoring plan with meter readings and follow-up checks so you can confirm materials have reached safe drying levels.
Rapid Drying Steps
Start drying within the first 24 to 48 hours to reduce the chance of mold returning. You protect your home and everyone in it by acting fast, using safe, targeted drying methods after water exposure.
Remove standing water with a wet vacuum or pump, then extract water from carpets, pads, and upholstery. Wear gloves, boots, and respiratory protection.
Increase airflow with proven ventilation techniques: open windows when conditions allow, run exhaust fans, and position air movers to push damp air outward.
Support evaporation with correct dehumidifier usage. Close unaffected rooms, empty collection tanks promptly, and keep units running continuously until materials feel dry.
Move wet belongings off floors, separate items for faster airflow, and discard porous materials that can’t be cleaned safely.
Quick action helps your household recover together.
Moisture Monitoring Plan
Drying equipment does the heavy work, but you still need a moisture monitoring plan to confirm materials have actually returned to safe levels. Use moisture sensors on drywall, subfloors, and framing, then log readings daily. Compare interior readings to unaffected areas so you know when drying is truly complete.
Track relative humidity and temperature in every affected zone. Good humidity control keeps conditions below mold-friendly ranges and prevents hidden pockets from rebounding. Check behind baseboards, inside cabinets, and near insulation where moisture lingers longest.
If readings stall, adjust airflow, dehumidification, or containment immediately. Keep records, because your team needs proof that conditions stabilized before rebuilding starts. When you monitor methodically, you protect your home, support everyone involved, and reduce the chance that water damage returns as mold later.
Frequently Asked Questions
Can Mold From Water Damage Affect Pets Differently Than Humans?
Yes, mold from water damage can affect your pets differently than you; mold exposure may trigger faster respiratory or neurological issues. Protect pet health with safety precautions, veterinary evaluation, and prevention strategies your household can follow.
How Long Should I Wait Before Repainting After Mold Cleanup?
Wait 24–48 hours after cleanup, and only repaint when surfaces test completely dry. You should follow repainting guidelines and verify moisture levels after mold removal techniques, so you protect your space and stay aligned with safety standards.
Does Homeowners Insurance Cover Hotel Stays During Mold Remediation?
Sometimes, your homeowners insurance covers hotel stays during mold remediation if your policy’s loss-of-use provision applies. You’ll need documentation, track remediation costs, and follow mold prevention tips to protect your home, health, and claim.
Can Mold Lower My Home’s Resale Value After Water Damage?
Yes, mold can lower your home’s resale value after water damage if you don’t document water damage restoration and apply mold prevention strategies. You’ll protect buyer confidence, meet safety expectations, and reduce inspection issues during resale.
Should Air Ducts Be Inspected After Water Damage Mold Issues?
Yes—like smoke hiding in walls, mold can linger in your ducts. You should inspect them promptly to protect air quality, confirm contamination, and determine whether duct cleaning or HVAC remediation keeps your home safe.
Conclusion
After water damage, your priority is speed: stop the leak, dry the area within 24 hours, remove saturated materials, and inspect for hidden mold. If growth is widespread, contaminated, or affects your health, don’t gamble—call a certified mold remediation professional. Document every step for insurance and future protection. Act fast today, or face a larger problem tomorrow: mold doesn’t wait, and neither should you. Quick action protects your structure, your air quality, and your safety.