
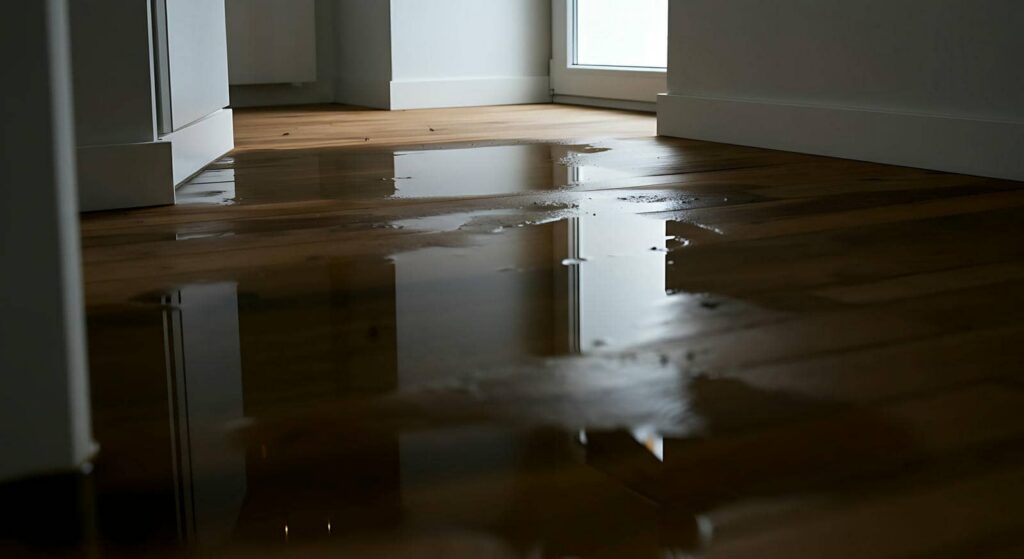
Water Damage Restoration Cleanup begins with a fast, organized response to limit damage and protect your property. Start by stopping the water source, securing the affected area, and assessing the level of contamination before cleanup begins. Standing water can quickly soak into walls, flooring, and belongings, making prompt extraction, thorough drying, and proper disinfection essential. Following the correct restoration process and documenting the damage for insurance can help prevent mold growth, structural issues, and more costly repairs later.
Key Takeaways
- Stop the water source immediately by shutting off the nearest valve, appliance supply, or main line, and contain exterior leaks temporarily.
- Turn off electricity in affected areas, wear gloves, boots, and eye protection, and treat all standing water as potentially contaminated.
- Extract standing water quickly, then dry with air movers and dehumidifiers while monitoring moisture to prevent further damage.
- Clean visible soil first, then disinfect with EPA-registered products after surfaces reach acceptable dryness and required contact times.
- Document all damage with photos, videos, inventories, and moisture readings, and call certified professionals for contaminated or extensive water loss.
Stop the Water Source First
Your first priority is to stop the water source before you begin any restoration work. You protect the structure, limit spread, and help your household regain control faster.
Start with water source identification: inspect supply lines, appliance hoses, fixtures, valves, roofs, and visible drain failures. If a plumbing line has failed, close the nearest isolation valve or shut off the main supply immediately. For appliance leaks, disconnect the unit and stop inlet flow.
For exterior intrusion, use temporary containment until permanent repairs begin. These immediate response strategies reduce saturation, shorten drying timelines, and support compliant documentation.
You also create a clearer restoration scope for professionals or insurers. By acting systematically, you become part of an effective response team, and your quick action helps everyone move forward together with confidence.
Stay Safe During Cleanup
Before you begin cleanup, verify that electrical circuits in affected areas are de-energized, and don’t enter spaces where shock hazards may exist.
You should wear compliant protective gear, including gloves, boots, and eye protection, to reduce exposure during removal and drying tasks.
If the water is contaminated, treat the area as a biohazard zone and follow stricter handling, disposal, and disinfection procedures.
Electrical Hazard Precautions
When water reaches outlets, extension cords, appliances, or the service panel, treat the area as energized until a qualified electrician or utility provider confirms otherwise. Don’t step into standing water to access switches or breakers. If you can safely reach the main disconnect from a dry location, perform a circuit shutdown immediately and document affected zones.
Next, isolate the area and prevent anyone in your household or work crew from re-entering until power status is verified. Tag damaged devices, unplug only from dry positions, and keep generators outside and away from openings.
Schedule an electrical inspection before cleanup equipment operates. You protect your group by following lockout guidance, utility instructions, and municipal code requirements. This disciplined approach keeps your restoration effort coordinated, compliant, and safer for everyone involved on site.
Protective Gear Essentials
Because contaminated water can carry sharp debris, pathogens, and chemical residue, you need PPE that matches the exposure level and the task.
Start with cut-resistant, waterproof hand protection; compare gloves types such as nitrile, neoprene, and heavy-duty PVC, then layer liners if dexterity matters. Use sealed boots with slip-resistant soles and puncture-resistant midsoles.
Protect your eyes with indirect-vent goggles, and add a face shield when splash potential increases. Choose respirators based on fit and filtration requirements; common mask materials include nonwoven polypropylene and elastomeric components with replaceable cartridges.
Wear disposable coveralls or washable long-sleeve garments that fully cover skin, and tape cuffs when needed. Inspect each item before use, replace compromised gear immediately, and follow your team’s PPE protocol so everyone works confidently, consistently, and safely together.
Contaminated Water Risks
Although floodwater may look manageable, you should treat all standing and absorbed water as contaminated until testing or source verification proves otherwise. Sewage backups, river overflow, appliance discharge, and storm intrusion can all introduce contaminated water sources carrying bacteria, viruses, chemicals, and sharp debris.
You protect yourself and your household by isolating affected areas, avoiding direct contact, and shutting off power where safe. Document water origin, depth, and duration because these factors determine cleanup protocol and disposal requirements.
Porous materials exposed to Category 3 water usually require removal, not drying. Wash thoroughly after any exposure, and don’t eat or drink in the work zone.
If you notice odors, discoloration, or symptoms like nausea, rashes, or coughing, stop work and consult qualified restoration professionals. You’re not alone.
Remove Standing Water Fast
You should remove standing water immediately to limit structural absorption, microbial growth, and material loss.
Start with rapid water extraction using equipment rated for the water depth, affected area, and contamination level.
Use safe pumping methods by controlling discharge rate, monitoring electrical hazards, and preventing pressure imbalance that could damage the structure.
Rapid Water Extraction
Within the first few minutes, rapid water extraction should begin to remove standing water before it penetrates deeper into flooring, wall cavities, and structural materials. You should isolate affected zones, document conditions, and deploy approved water extraction techniques as part of your emergency response plan.
Start with the highest-volume accumulation areas and verify moisture migration paths across adjoining rooms. You’ll improve control when you remove water in a systematic sequence, maintain clear access routes, and separate salvageable contents from saturated debris.
Use calibrated meters to support extraction priorities and confirm progress. Your team should coordinate communication, safety checks, and equipment staging so everyone works within the same compliant process.
Fast, organized extraction reduces secondary damage, supports structural stability, and helps your property recovery stay efficient, predictable, and aligned with restoration standards.
Safe Pumping Methods
Before pumping starts, assess water depth, contamination category, electrical hazards, and structural load so you can choose the correct pump type, discharge route, and PPE.
Start water removal from the highest accessible point, then stage pumping techniques to prevent hydrostatic imbalance, slab heave, or wall failure. You should isolate power, verify GFCI protection, and monitor discharge flow continuously.
Match submersible, trash, or utility pumps to debris load and lift requirements.
Pump in controlled intervals when flooding surrounds the structure to equalize pressure.
Document readings, moisture migration, and containment steps to support compliant restoration.
As part of a disciplined response team, you’ll protect occupants, materials, and downstream areas.
Finish by wet-vacuuming residual water, then shift immediately to dehumidification and antimicrobial controls for complete drying.
Dry Wet Walls and Floors
Start by removing standing water, then dry wet walls and floors with controlled airflow, dehumidification, and continuous moisture monitoring.
Position axial air movers to create consistent circulation across surfaces, and use low-grain refrigerant dehumidifiers to pull vapor from the air. You should document moisture measurement readings with a calibrated meter, comparing wet materials to unaffected areas to establish drying goals.
For wall drying, remove baseboards if needed, open limited access points, and direct airflow into cavities without causing secondary damage.
Lift and dry flooring assemblies according to material type and manufacturer guidance. Keep interior temperatures stable, check humidity daily, and adjust equipment based on verified progress.
Clean and Disinfect Wet Areas
Clean and disinfect wet areas once moisture levels are verified within acceptable drying targets, because residual contamination can remain even after materials appear dry. You should use EPA-registered, effective disinfectants matched to the affected surface and water category.
Pre-clean visible soil, follow label dwell times, and maintain required ventilation and PPE. This step supports a safe, compliant restoration process your whole household can trust.
- Remove debris and residue before applying disinfectants for full surface contact.
- Treat corners, seams, and porous interfaces where contaminants often persist.
- Document products, concentrations, and contact times for insurance and quality control.
You also strengthen overall recovery by separating clean tools from contaminated ones and changing cloths frequently.
Keep these mold prevention tips focused on sanitation controls only, so your restoration team stays aligned, confident, and protected together.
Prevent Mold After Cleanup
Once cleanup is complete, you should control moisture, temperature, and airflow immediately to prevent mold from colonizing damp materials within 24 to 48 hours.
Use dehumidifiers to keep relative humidity below 50 percent, and run air movers to dry concealed cavities and hard surfaces evenly.
You should verify drying progress with moisture meters, hygrometers, and infrared imaging when available.
Maintain indoor temperatures between 68 and 77 degrees Fahrenheit to support evaporation without creating condensation.
As part of your mold prevention strategies, inspect grout lines, baseboards, subfloors, and HVAC components for residual dampness daily.
Replace HVAC filters after exposure and document readings for compliant post cleanup maintenance.
When you follow these steps consistently, you help protect your space and everyone in it from secondary microbial growth and odor.
Decide What to Save or Toss
A salvage decision should follow documented water category, exposure duration, material porosity, and visible or measured contamination. You should sort contents into salvageable, questionable, and non-salvageable groups, then isolate each group to prevent cross-contamination.
Non-porous items exposed to clean water are often recoverable after cleaning and drying. Porous materials contacted by gray or black water usually require disposal. Use item prioritization to address health risk first, then function, replacement cost, and sentimental value, so your household feels organized and supported.
- Keep hard, cleanable items with limited exposure.
- Discard saturated porous contents with contamination indicators.
- Set aside uncertain items for professional evaluation.
You don’t have to decide alone; following clear criteria helps your family make consistent, compliant choices and move forward together with confidence after water loss.
Document Damage for Insurance
Before cleanup changes the scene, document every affected area and item with time-stamped photos, video, and a written inventory that notes location, material, model number, condition, and estimated age.
Capture wide shots first, then closeups of serial labels, waterlines, staining, warping, and debris. Separate losses by room and by document types, including receipts, warranties, appraisals, and maintenance records.
Save digital copies in cloud storage and back them up to your phone. Record dates, weather conditions, shutoff actions, and any temporary mitigation materials you used. Keep damaged items, packaging, and samples when safely possible, because insurers may request verification.
Contact your carrier promptly, ask for claim requirements, and log every call, email, claim number, and adjuster instruction. This disciplined record supports accurate insurance claims and helps your household stay organized together.
Know When to Call a Pro
Because water damage can escalate quickly, you should call a certified restoration professional when the source is contaminated, the affected area is extensive, or moisture has reached structural cavities, insulation, electrical systems, or HVAC components. Acting early protects your home and keeps your recovery aligned with industry standards.
You notice persistent odors, staining, warping, or other water damage signs.
You need moisture mapping, containment, and a documented professional assessment.
You want safe drying protocols that support your household and community.
If cleanup stalls after extraction, don’t wait. Hidden moisture can trigger microbial growth, material failure, and code-related safety issues.
A trained team uses calibrated meters, thermal imaging, and controlled drying equipment to verify conditions and reduce risk. When you call promptly, you join homeowners who restore confidently and responsibly.
Frequently Asked Questions
How Long Does Homeowners Insurance Claim Processing Usually Take After Water Damage?
You can expect your insurance claim to process in 14 to 30 days after water damage, though complex cases take longer. You’ll move things faster by documenting losses, supporting the damage assessment, and responding promptly.
Are Water Damage Restoration Costs Tax-Deductible in Any Situations?
Yes, you may deduct water damage restoration costs when a federally declared disaster causes unreimbursed losses, or when the property is rental or business-use. You should document insurance coverage, basis adjustments, and potential tax benefits carefully.
How Can I Prepare an Emergency Water Damage Kit Beforehand?
Build your kit like a fortress: use waterproof storage, then stock essential supplies—gloves, flashlights, batteries, shutoff tools, plastic sheeting, sanitizer, documents, and contacts. You’ll stay compliant, organized, and ready when your community needs resilience.
What Certifications Should I Look for in a Restoration Company?
Look for IICRC certification types, state licensing, and OSHA training. You’ll want firms following ANSI-approved industry standards, carrying insurance, and documenting technician qualifications. That ensures you hire a compliant, technically competent team you can trust.
Does Water Damage Affect Home Resale Value After Repairs?
Yes—like rebuilding after a storm, you can see resale impact after repairs. Buyers scrutinize documentation, material replacement, and moisture verification; their repair perception shapes offers. You protect value when repairs meet code and inspection standards.
Review
By stopping the source, protecting yourself, extracting water quickly, drying materials thoroughly, disinfecting affected areas, and preventing mold, you reduce structural loss and health risk. You should separate salvageable contents from non-restorable debris, document all damage, and keep records for insurance compliance. If contamination, hidden moisture, or electrical hazards remain, call a certified restoration professional immediately. In this process, act like a careful cartographer: map each loss precisely, and your recovery will proceed faster and more safely.