
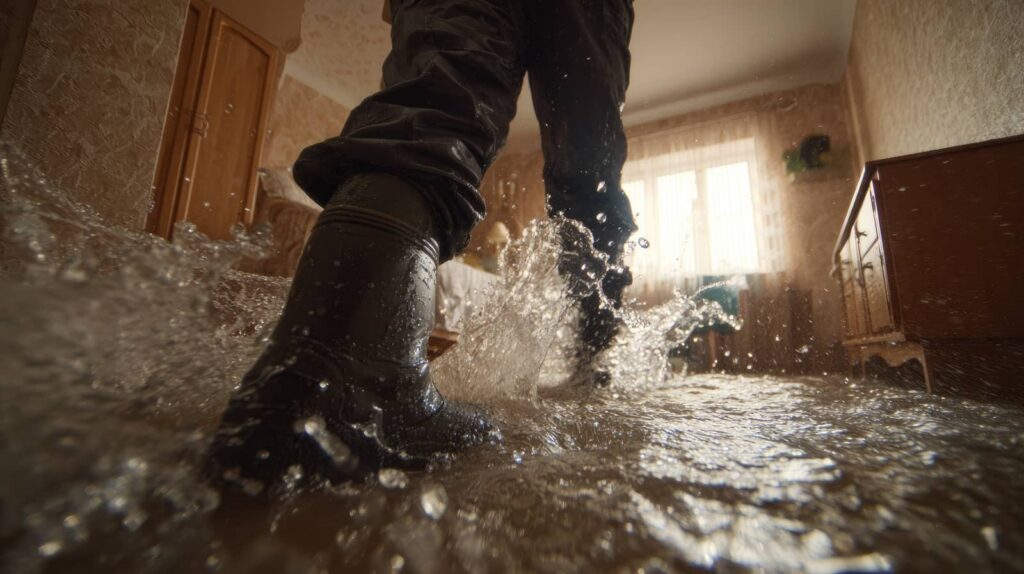
When a pipe bursts, Burst Water Damage Cleanup needs to begin quickly and in the right order. Start by shutting off the water, isolating electrical risks, and evaluating what can be saved. Then move to extraction, drying, sanitation, and moisture checks to limit structural damage and mold growth. If you miss a step, hidden moisture can continue causing problems long after surfaces look dry. The next tips show you where mistakes usually happen.
Key Takeaways
- Shut off the nearest water valve immediately and confirm flow has stopped to prevent additional flooding.
- Check for electrical hazards, standing water, and structural damage before entering or starting cleanup.
- Remove standing water quickly with pumps or a wet/dry vacuum to reduce damage and mold risk.
- Dry the area with fans and dehumidifiers, then discard porous materials that cannot be fully dried.
- Clean and disinfect hard surfaces, then monitor hidden moisture behind walls and under flooring daily.
Shut Off the Water Supply
First, shut off the main water supply immediately to stop additional flow into the damaged area. You should locate the nearest water valve, then rotate it clockwise until it fully closes. If your home uses a lever-style control, turn it perpendicular to the pipe. Act decisively, but verify closure by checking whether fixtures stop running.
If the primary shutoff is inaccessible, use the meter-side valve only if local guidance permits homeowner operation. Keep a wrench nearby as part of your emergency preparedness plan, and label each shutoff point clearly. You’re protecting your home and supporting everyone who relies on it.
After flow stops, note the valve position and monitor for continued seepage. That method gives your household a disciplined first response and a stronger sense of control together.
Make Sure the Area Is Safe
Before you enter the affected space, confirm that it doesn’t present immediate electrical, structural, or contamination hazards. Check for standing water near outlets, sagging ceilings, buckled floors, and cracked drywall. If the area is dark, use a battery-powered light instead of wired fixtures.
Next, assess hazards systematically. Put on gloves, waterproof boots, and, if needed, a respirator to limit contact with contaminated water or airborne particles. Test walking surfaces for stability before you shift weight, and keep children and pets out of the zone.
Follow core safety precautions by isolating sharp debris, turning off electricity at the breaker only if you can reach it safely, and opening windows when conditions allow. These steps help you protect yourself and keep your household aligned around a safe, disciplined cleanup process.
Call a Water Damage Pro if Needed
If the burst pipe affected a large area, soaked structural materials, or involved contaminated water, call a licensed water damage professional right away.
You need expert assessment when framing, insulation, subfloors, or electrical components may be compromised. Certified technicians use moisture mapping, thermal imaging, and contamination protocols to define scope, reduce hazards, and document conditions accurately.
Before crews arrive, gather your emergency contacts, insurer details, and a current property inventory.
Clear records support insurance claims and help restoration services prioritize affected rooms, materials, and contents. Ask the contractor about licensing, drying standards, antimicrobial procedures, and documentation practices.
Request a written plan, estimated timeline, and communication schedule so everyone stays aligned. Taking these steps helps you protect your home, support your household, and move forward confidently together.
Remove Standing Water Quickly
You need to extract standing water immediately to reduce material saturation and limit structural damage.
Use pumps and wet/dry vacuums rated for flood cleanup, and keep electrical hazards and unstable surfaces in check while you work.
Acting fast also helps prevent water from spreading into adjacent rooms, subflooring, and wall cavities.
Immediate Water Extraction
Start water extraction as soon as it’s safe to enter the area, because standing water spreads damage quickly into flooring, baseboards, drywall, and structural cavities. Your emergency response should begin with hazard verification, moisture mapping, and containment so affected zones don’t expand beyond the initial loss area.
Work methodically. Identify the water source, stop active flow, and isolate contaminated materials from clean areas.
Use proven water extraction techniques by prioritizing the deepest pooling, checking wall bases, and tracking migration paths under finishes. You’ll protect adjoining rooms when you create clear access routes and limit foot traffic.
Document wet materials, temperature, and humidity as you go, since accurate records support the cleanup plan and keep everyone aligned. Acting quickly and systematically helps your team reduce secondary damage and stabilize the structure for the next restoration steps.
Use Pumps And Vacuums
Deploy pumps first in areas with the deepest pooling, then switch to wet vacuums for shallow water, edges, and surface irregularities that larger equipment can’t clear efficiently.
In your flood response plan, match sump pumps to volume and discharge distance, then verify power sources and hose routing before starting water removal.
Use controlled extraction techniques: work from lowest points outward, monitor fill rates, and empty tanks before suction drops.
Wet vacuums help you capture residual water along base plates, corners, and uneven floors.
Follow safety precautions by wearing insulated boots and checking cords, plugs, and GFCI protection.
Keep your team aligned with clear hand signals and task assignments so everyone moves confidently together.
Finish with basic equipment maintenance: rinse filters, inspect seals, and document performance for future efficiency tips and faster recovery.
Prevent Further Spread
Because standing water migrates fast through seams, joints, and porous materials, remove it immediately to limit spread into adjacent rooms, wall cavities, and subfloor assemblies.
Work systematically so your home stays safer and your cleanup team stays coordinated.
- Shut power to affected zones before using sump pumps or wet vacs.
- Create water barriers at thresholds, then direct flow toward drainage solutions.
- Move saturated rugs, contents, and base-level insulation to support moisture control.
- Inspect perimeter risks requiring foundation repairs, insulation upgrades, landscaping adjustments, and plumbing maintenance.
You protect more than materials when you act fast; you protect shared living space and indoor air quality.
Keep extraction continuous, monitor seepage paths, and verify containment until surfaces stop releasing water and structural components begin drying.
Dry the Area Right Away
Move quickly to dry the affected area once the water source is shut off, since moisture can wick into drywall, insulation, subflooring, and framing within hours.
Start by removing standing water with a wet vacuum, then blot remaining surface moisture with clean towels. Open interior doors, lift rugs if safe, and promote air circulation with fans aimed across wet surfaces, not directly into electrical hazards.
Next, focus on dehumidifier use to pull water vapor from the air and stabilize indoor humidity. Position units centrally, empty reservoirs regularly, and monitor progress with a hygrometer if you have one.
Wear gloves, boots, and an N95 if dust or contaminants are present. By drying systematically, you protect structural materials, reduce microbial growth risk, and help your household recover together, more confidently and safely.
Decide What to Keep or Toss
Once the area is dry enough to inspect safely, sort wet items by material, contamination level, and how long they were exposed. Your goal is to protect your household, document losses, and salvage what can still serve your space.
- Keep nonporous items if they remain structurally sound and show no swelling, delamination, or electrical risk.
- Toss porous materials saturated by contaminated water, including insulation, particleboard, and many upholstered goods.
- Assess sentimental items separately; photograph them, isolate them, and consult a restoration specialist before making final decisions.
- Document everything you discard with photos, dates, and notes for insurance and replacement planning.
Use gloves and follow safety considerations when handling damaged belongings.
If an item smells, crumbles, warps, or may harbor hidden moisture, it doesn’t belong indoors anymore.
Clean and Disinfect Surfaces
After you’ve removed unsalvageable materials, clean every affected hard surface with soap or detergent and water to lift dirt, residue, and biofilm before you disinfect.
Work top to bottom, using separate cloths for cleaner and rinse water so you don’t redeposit contaminants. Wear gloves and eye protection throughout.
Next, choose disinfecting agents labeled for water damage cleanup, and follow dilution, dwell time, and ventilation requirements exactly.
Different surface types respond differently, so test products on an inconspicuous area and avoid mixing chemicals.
Scrub nonporous counters, tile, metal, and sealed wood, then let them remain visibly wet for the full contact time. Rinse if the label requires it.
Check for Hidden Moisture
After you clean and disinfect surfaces, you need to check for hidden moisture that can keep damaging materials and support mold growth.
Inspect behind walls and under flooring, because trapped water often spreads beyond the visible wet area.
Use moisture meters to verify moisture levels and confirm the structure is drying safely and completely.
Inspect Behind Walls
Two checks matter here: inspect the wall cavity itself and verify how far moisture has migrated beyond the visible wet area.
You can’t rely on surface dryness; hidden leaks often linger inside framing bays and saturate wall insulation. Work deliberately, shut off power to affected circuits, wear gloves and eye protection, and document readings so your cleanup team stays aligned.
- Remove baseboards or a small access section to inspect cavity conditions directly.
- Use a moisture meter on studs, sheathing, and drywall edges to map spread.
- Check for staining, swelling, fastener rust, or odor that signals microbial growth.
- Confirm drying progress daily until readings stabilize at normal baseline levels.
Check Under Flooring
Several flooring layers can trap water long after the surface looks dry, so you need to check beneath the finish material before you assume the area is stable. Lift a corner or remove a threshold so you can inspect the underlayment, subfloor, and edges without spreading contamination or causing avoidable damage.
Different flooring types hold moisture differently, so follow a disciplined sequence. Check carpet pad first, then engineered planks, laminate seams, vinyl edges, or tile underlayment.
Look for darkened wood, swollen fiberboard, loosened adhesive, rusted fasteners, and debris lines that show water travel. Pay close attention near walls, cabinets, and boundaries, where moisture barriers can slow drying and hide trapped water.
Wear gloves, knee protection, and respiratory protection if musty odors appear. Careful inspection helps you protect your home and support everyone involved in recovery.
Use Moisture Meters
Because water often migrates beyond the visible wet area, you should use a moisture meter to confirm where saturation remains and how far it has spread. Accurate moisture detection helps you protect your home and everyone depending on you.
- Verify meter calibration before testing, so readings stay reliable across drywall, wood, and subfloor materials.
- Establish a dry baseline in an unaffected area, then compare suspect zones methodically.
- Probe baseboards, wall cavities, flooring edges, and insulation connections where hidden moisture commonly lingers.
- Record readings by room and height, then repeat checks daily until levels stabilize within acceptable ranges.
You’ll make safer cleanup decisions when data guides each step. With disciplined testing, you’re not guessing—you’re restoring your space with the same care trusted professionals use.
Stop Mold Before It Starts
After a pipe bursts, mold can begin colonizing damp drywall, insulation, and wood within 24 to 48 hours, so you need to dry all affected materials fast and keep indoor humidity under 60 percent.
Prioritize mold prevention by removing saturated porous items that can’t be fully dried. Use air movers to increase evaporation, then run dehumidifiers continuously for disciplined humidity control.
Open cavities only if water migrated behind finishes, and wear gloves, eye protection, and an N95 respirator while handling contaminated materials. Clean nonporous and semi-porous surfaces with detergent and water, then dry them completely; don’t rely on bleach as your primary solution.
Verify progress with repeated moisture readings and visual checks for staining or musty odors. By acting systematically, you’ll protect your space and help keep everyone in your home safer.
Repair the Pipe and Prevent Future Bursts
Once affected materials are drying under control, address the failed plumbing so the leak can’t restart and undo your cleanup work. Shut off water, depressurize lines, and inspect the split, fittings, and nearby supports before choosing a repair.
- Replace cracked sections with matching pipe and approved couplings; don’t rely on temporary wraps.
- Verify pressure, anchoring, and alignment so vibration or water hammer doesn’t stress the new joint.
- Improve pipe maintenance by checking for corrosion, drafts, and unheated chases throughout your home.
- Add insulation upgrades on exposed runs, especially near exterior walls, crawl spaces, and attics.
You protect your household best when you test the repair slowly, monitor for seepage, and document what failed.
That disciplined approach keeps your home safer and helps everyone stay prepared together.
Frequently Asked Questions
Will Homeowners Insurance Cover Damage From a Burst Pipe?
Yes, your homeowners insurance often covers burst-pipe damage if you’ve maintained pipe maintenance and the loss was sudden, but insurance policies vary. You should verify exclusions, document damage, mitigate hazards, and follow your carrier’s claim procedures.
How Long Does Burst Water Damage Restoration Usually Take?
Like resetting a system, you’ll usually need 3–7 days; severe losses can take weeks. You’ll speed recovery with prompt water extraction, structured drying, and mold prevention, while your restoration team verifies moisture levels safely.
Can I Stay in My Home During Cleanup?
Yes, you can stay home during cleanup if professionals confirm safety precautions, stable air quality, and isolated work zones. You’ll need strict containment, daily moisture monitoring, and clear contractor guidance so everyone in your household stays protected.
What Documents Should I Save for Insurance Claims?
Save photos, videos, repair estimates, receipts, inventory lists, policy pages, adjuster correspondence, and temporary housing costs. You’ll strengthen the claim process by following documentation tips, organizing dates, preserving damaged-item evidence, and backing up every file securely.
How Much Does Burst Water Damage Cleanup Typically Cost?
Like a trusty telegraph, you’ll typically pay $1,300-$5,600 for burst water cleanup, depending on extent, repair methods, and contamination. You protect your home by prioritizing safe drying, contractor assessment, and prevention tips your community trusts.
Wrap-Up
Burst damage cleanup works best when you follow a strict sequence: isolate water, control hazards, extract, dry, disinfect, verify hidden moisture, and repair the failure. That order supports the theory that faster intervention reduces structural damage and mold risk—and in practice, it usually does. If you document conditions, use meters, and don’t ignore contaminated materials, you’ll improve results and safety. When damage exceeds your equipment or training, you should bring in a qualified water damage professional immediately.