
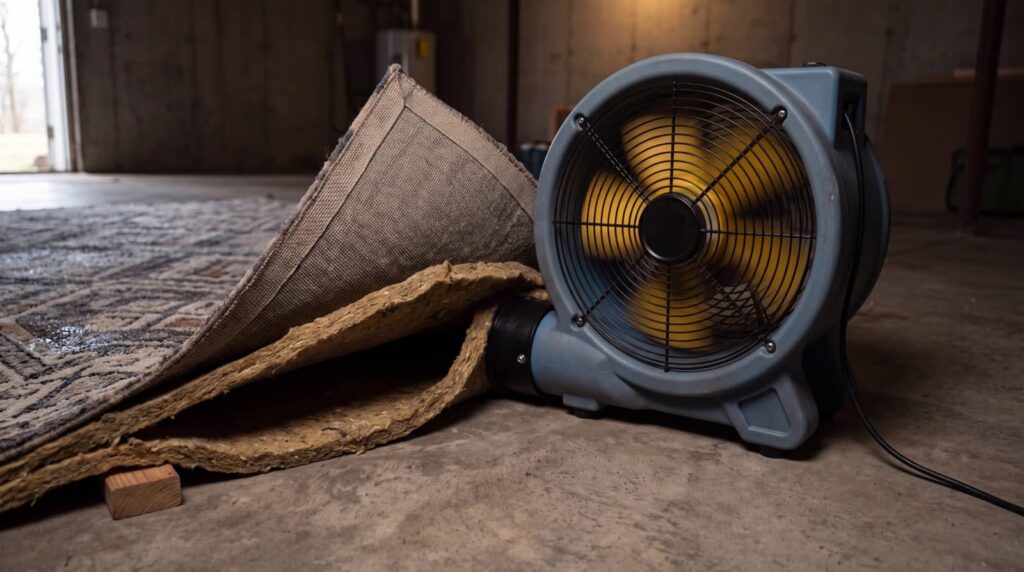
Dehumidification for Water Damage Cleanup is the controlled removal of excess moisture from your air, surfaces, and structural materials after a leak, flood, or burst pipe. You use it to lower humidity, speed evaporation, and stop hidden moisture from driving mold growth, swelling, and secondary damage. It works alongside extraction and airflow, not as a substitute for them. If you don’t dry the structure in the right sequence, moisture can remain where you won’t see it.
Key Takeaways
- Dehumidification removes excess moisture from air and building materials after water damage to speed drying and limit secondary damage.
- It begins after stopping the water source and extracting standing water, ideally within 24 to 48 hours.
- Dehumidifiers work with air movers to increase evaporation and capture water vapor from wet surfaces and hidden cavities.
- Moisture trapped in drywall, wood, insulation, and air can remain after visible water is gone, so drying must be verified.
- Technicians monitor humidity and material moisture with meters to confirm drying goals and prevent mold, odors, and material damage.
What Is Dehumidification After Water Damage?
After water damage, dehumidification is the controlled removal of excess moisture from the air and affected materials to accelerate drying and limit secondary damage. You use it to reduce humidity to a target range, measure moisture conditions, and support a uniform drying process across the affected area.
In practice, you pair monitoring with specific equipment types, including refrigerant dehumidifiers, desiccant dehumidifiers, air movers, and meters. You place, run, and adjust this equipment based on room volume, material class, and moisture readings.
As part of a coordinated cleanup team, you verify progress through repeated psychrometric checks and material measurements. The core dehumidification benefits are procedural control, predictable drying performance, and consistent moisture reduction within a documented restoration standard for everyone involved on site daily.
Why Dehumidification Matters During Cleanup
Because standing water is only part of the problem, you need dehumidification during cleanup to remove the vapor that migrates into air cavities, insulation, framing, and finishes.
If you leave that hidden moisture in place, materials stay above safe drying thresholds, and secondary damage accelerates.
You protect your structure by lowering relative humidity, stabilizing evaporation, and preventing moisture from reabsorbing into porous materials.
That’s where dehumidification benefits become measurable: faster drying, better moisture control, reduced microbial risk, and improved restoration accuracy.
As part of a disciplined cleanup team, you use dehumidifiers to support air movers, maintain drying goals, and verify progress with readings from hygrometers and moisture meters.
This process helps you return affected areas to a dry, stable condition with confidence and documented consistency.
When to Start Dehumidifying After a Burst Pipe
You should start dehumidifying as soon as you’ve stopped the water source, removed standing water, and confirmed it’s safe to power drying equipment.
This immediate step lowers ambient moisture before mold can establish within the first 24 to 48 hours.
If you detect damp surfaces, elevated indoor humidity, condensation, or musty odor, that’s your signal to begin.
Immediate Dehumidification Timing
When a burst pipe releases water, start dehumidification as soon as you stop the source and begin extraction, since airborne moisture keeps migrating into drywall, insulation, subflooring, and framing.
Your immediate action should follow water removal, not wait for visible dampness to fade. Position dehumidifiers once standing water is extracted and airflow paths are established.
Set equipment to manufacturer-recommended dehumidifier settings for the room size, temperature, and material load. Close exterior openings, isolate the affected zone, and keep HVAC conditions stable so moisture doesn’t redistribute.
You’ll get better control when you pair dehumidification with air movers and track relative humidity, grain depression, and surface readings. This sequence helps your cleanup team work as one system, protecting structural materials and shortening the overall drying window without delaying critical moisture reduction across all wet assemblies.
Drying Before Mold
Start dehumidifying immediately after you stop the burst pipe and remove standing water, since mold can begin colonizing damp materials within 24 to 48 hours under favorable conditions. That step places you in the standard response sequence professionals use for mold prevention and structural drying.
Position dehumidifiers as soon as extraction ends. Close windows and exterior doors to stabilize humidity control, then run air movers to direct moisture toward the dehumidification zone.
You should prioritize enclosed rooms, insulation cavities, and porous materials that retain bound water. Empty reservoirs or connect drains continuously so units operate without interruption.
Monitor ambient relative humidity and temperature every few hours to verify consistent drying conditions. By acting within this early window, you help protect finishes, reduce microbial risk, and follow the disciplined cleanup practices your property deserves.
Signs To Begin
How do you know it’s time to begin dehumidifying after a burst pipe? Start as soon as you’ve stopped the water source, removed standing water, and confirmed materials remain damp. You’re looking for early indicators: condensation on windows, a persistent damp odor, warped trim, or tacky flooring. These signs show moisture has moved beyond surface level.
Next, verify moisture levels with a hygrometer or moisture meter. If indoor relative humidity stays above normal baseline, or drywall, subflooring, and framing test wet, begin dehumidification immediately. Don’t wait for visible mold or discoloration.
Your goal is to join the best-practice response sequence: extract, measure, dehumidify, monitor. Position equipment once airflow paths are clear and electrical hazards are controlled.
Then document readings daily until materials reach dry standard.
How Dehumidification Removes Hidden Moisture
You can’t dry a water-damaged area fully until you remove moisture trapped in drywall, wood, insulation, and other porous materials.
You use controlled airflow to move saturated boundary air away from wet surfaces, which increases evaporation from those materials into the air.
Then your dehumidifier extracts that airborne moisture, reducing humidity so hidden moisture continues to migrate out.
Moisture Trapped In Materials
Even after surface water is removed, significant moisture can remain locked inside drywall, wood framing, insulation, subfloors, and concrete. You can’t rely on appearance alone, because moisture retention persists within pores, fibers, and bonded layers.
If you leave that hidden saturation untreated, material damage continues through swelling, delamination, corrosion, and microbial amplification.
You protect the structure by lowering ambient humidity until trapped water migrates out of affected materials and into the air for removal.
In professional cleanup, you verify progress with moisture meters, hygrometers, and material-specific drying targets. This measured approach helps your team distinguish wet cores from dry surfaces, document conditions, and prevent premature closure.
When you follow these standards, you support a restoration process everyone can trust and stand behind together with confidence.
Airflow And Evaporation
As dehumidifiers lower the air’s vapor content, airflow across wet materials accelerates evaporation from internal pores and surface films into the surrounding air. You create a pressure gradient that pulls bound moisture outward, where the dehumidifier can capture it.
Strategic air mover placement keeps evaporation uniform, prevents stagnant zones, and reduces secondary damage in wall cavities, subfloors, and insulation.
You’ll get better results when you coordinate airflow with measured humidity levels, temperature, and material permeability. Technicians in your restoration team monitor psychrometric conditions, adjust equipment angles, and verify moisture reduction with meters and thermal imaging.
This controlled process protects structural components, limits microbial growth, and supports healthier air quality. When you understand how airflow and evaporation work together, you’re part of a more effective, accountable cleanup process overall.
Best Dehumidifiers for Water Damage Cleanup
When water damage raises indoor humidity above safe drying limits, the best dehumidifier is the one that matches the affected area’s square footage, moisture load, and operating conditions.
You’ll usually compare refrigerant and desiccant dehumidifier types. Refrigerant units suit warmer spaces and moderate-to-heavy moisture. Desiccant units perform better in cooler areas where refrigerant efficiency drops.
You should also verify extraction capacity, airflow rating, drainage setup, and energy efficiency before selecting equipment.
For large losses, choose commercial LGR models because they remove more moisture per kilowatt hour and tolerate continuous operation.
For smaller, contained rooms, a compact unit may be enough if its pint-per-day rating aligns with measured humidity.
As part of a disciplined cleanup team, you’ll get better results when your dehumidifier fits the job, not just the budget.
How Drying Works With Dehumidification
You speed drying by moving air across wet materials, which increases evaporation at the surface.
As moisture enters the air, your dehumidifier extracts it by cooling or adsorbing water vapor from the airstream.
When you control airflow and humidity together, you create the pressure gradient needed to pull remaining moisture from deeper layers.
Air Movement Role
Two processes drive effective drying after water damage: air movement lifts moisture from wet materials into the air, and dehumidification removes that vapor from the environment.
You improve evaporation when you position air movers to create consistent surface velocity across walls, floors, and contents without causing cross-contamination.
Start with moisture assessment so you know which materials need targeted circulation. Then apply airflow techniques that match the affected assembly: low-angle flow for flooring, directed wall coverage for cavities, and balanced circulation for rooms with mixed materials.
Keep air moving continuously to disrupt the humid boundary layer that forms on wet surfaces. As moisture enters the air, dehumidifiers can capture it efficiently, helping your team maintain controlled drying conditions.
When you coordinate both processes correctly, you support a thorough, professional restoration outcome together.
Moisture Extraction Process
Capture the water at each stage of the drying cycle to keep moisture from reabsorbing into materials. You first identify moisture sources, then remove standing water, release bound moisture with airflow, and condense vapor through dehumidification. This coordinated sequence keeps your drying team aligned and your structure on track.
- Inspect affected zones with meters and thermal imaging.
- Apply extraction techniques to remove liquid from surfaces.
- Increase evaporation using directed air across wet materials.
- Pull humid air through dehumidifiers to capture vapor.
- Verify drying goals with readings until materials stabilize.
You don’t just dry visible water; you control migration, temperature, and humidity ratios.
Signs Your Home Still Needs Dehumidification
Even after visible water is gone, elevated indoor humidity can persist and continue damaging materials. You should verify humidity indicators daily, including hygrometer readings above normal range, fogging on windows, and a persistent musty odor. These conditions signal residual dampness inside drywall, subflooring, insulation, and framing members.
You may also notice cool, clammy air, swelling baseboards, cupping wood floors, peeling paint, or recurring condensation near exterior walls.
Test hidden assemblies with moisture meters, and compare affected rooms with dry reference areas. If readings remain elevated, your structure hasn’t reached a stable drying standard. You should continue dehumidification until measurements, odors, and surface conditions align.
How Long Dehumidification Usually Takes
Although every water-loss case dries at a different rate, you can expect dehumidification to take several days to more than a week, depending on the water category, the number of wet materials, room temperature, air movement, and how quickly drying equipment was installed.
You’ll usually see dehumidification duration shaped by measurable site conditions, including:
- Moisture depth in drywall, flooring, and framing
- Indoor temperature and relative humidity targets
- Air mover placement and cubic feet per minute
- Dehumidifier capacity, grain depression, and extraction rate
- Daily moisture readings from meters and thermal imaging
As a rule, you’ll track progress every 24 hours and adjust using effective methods that support your drying goals.
When your structure reaches documented dry standards, your community of occupants can move forward with confidence and safer indoor conditions together.
Common Dehumidification Mistakes to Avoid
Because drying equipment can remove moisture only under the right conditions, several common mistakes can slow dehumidification, extend material damage, and increase the risk of secondary issues like microbial growth.
Avoid undersizing equipment, skipping containment, and placing units where airflow short-circuits or bypasses wet assemblies.
You’ll also want disciplined dehumidifier selection based on cubic footage, temperature, and material load, not guesswork.
Keep doors and windows closed so outside vapor doesn’t overwhelm the drying chamber.
Maintain continuous operation; frequent shutdowns stall evaporation.
Use humidity monitoring to track relative humidity, grains per pound, and daily progress, then adjust equipment accordingly.
Don’t ignore hidden moisture in cavities, under flooring, or behind trim.
When you follow these controls, you help your space dry evenly and support the restoration goals your community values.
When to Call Water Damage Cleanup Pros
When should you call water damage cleanup pros? Contact them when moisture extends beyond visible surfaces, odors persist, or your cleanup timeline exceeds safe drying targets. You protect your home best by acting early and following proven restoration standards together.
- Water reached drywall, insulation, subfloors, or structural cavities.
- Humidity stays elevated after ventilation and dehumidifier operation.
- You detect microbial growth, staining, or persistent musty odors.
- Electrical systems, HVAC components, or appliances contacted water damage.
- The source involves sewage, stormwater, or unknown contamination.
Pros use meters, thermal imaging, containment, and calibrated dehumidification to verify dry standards.
You also need experts if occupants have asthma, allergies, or immune sensitivity.
Frequently Asked Questions
Can Dehumidification Increase My Electricity Bill During Water Damage Cleanup?
Yes, dehumidification can increase your electricity bill during cleanup because equipment raises energy consumption. You can improve cost efficiency by running properly sized units, monitoring runtime, and following your restoration team’s drying plan closely.
Is Dehumidification Safe for Homes With Pets or Small Children?
Yes, you can safely use dehumidification around pets and small children if you follow procedures: maintain ventilation, secure cords, limit access, and monitor humidity. These controls support pet safety and protect child health during cleanup.
Will Dehumidification Help Remove Water Damage Odors From Furniture and Carpets?
Yes—if you test the theory, you’ll find dehumidification often reduces odors in carpets and furniture by lowering moisture that feeds microbes. You should pair it with cleaning for complete odor elimination and better furniture restoration results.
Can I Stay in My Home While Dehumidification Equipment Is Running?
Yes, you can usually stay home while dehumidification equipment runs, provided technicians verify safety, noise tolerance, and airflow. Follow equipment placement instructions to maximize dehumidification benefits, keep vents unobstructed, and avoid restricted work areas.
Does Homeowners Insurance Cover Dehumidification After Water Damage?
Yes—some insurance policies cover dehumidification after water damage if you document losses, verify peril eligibility, and review coverage limits. You’ll fit the process by filing promptly, following mitigation procedures, and confirming your adjuster’s authorization.
Wrap-Up
Dehumidification turns water damage cleanup from guesswork into a controlled drying process. If you start early, monitor moisture readings, and use the right equipment, you’ll remove visible dampness and hidden moisture. Ignore it, and dry surfaces can mask wet materials, inviting odor, warping, and microbial growth. Your goal isn’t just to make the area look dry; it’s to verify that it is dry. When conditions stay unstable, you should bring in water damage cleanup professionals immediately.